


In the app, there will be 2 emails sent out after the quote is submitted.
They are
- Mail notifications (admin email)
- Auto Response email (customer email)
In each email type, you can select one of 2 email templates (basic and advanced) to edit your email content.
Please follow the steps below to configure the email templates.
Configure Admin email template
Basic email template
- In app admin page, click Settings > Notifications > Email notifications
- Click Basic tab to show the email template you want to edit
- On the left side, enter your information and select options to add data to email template
- Save template
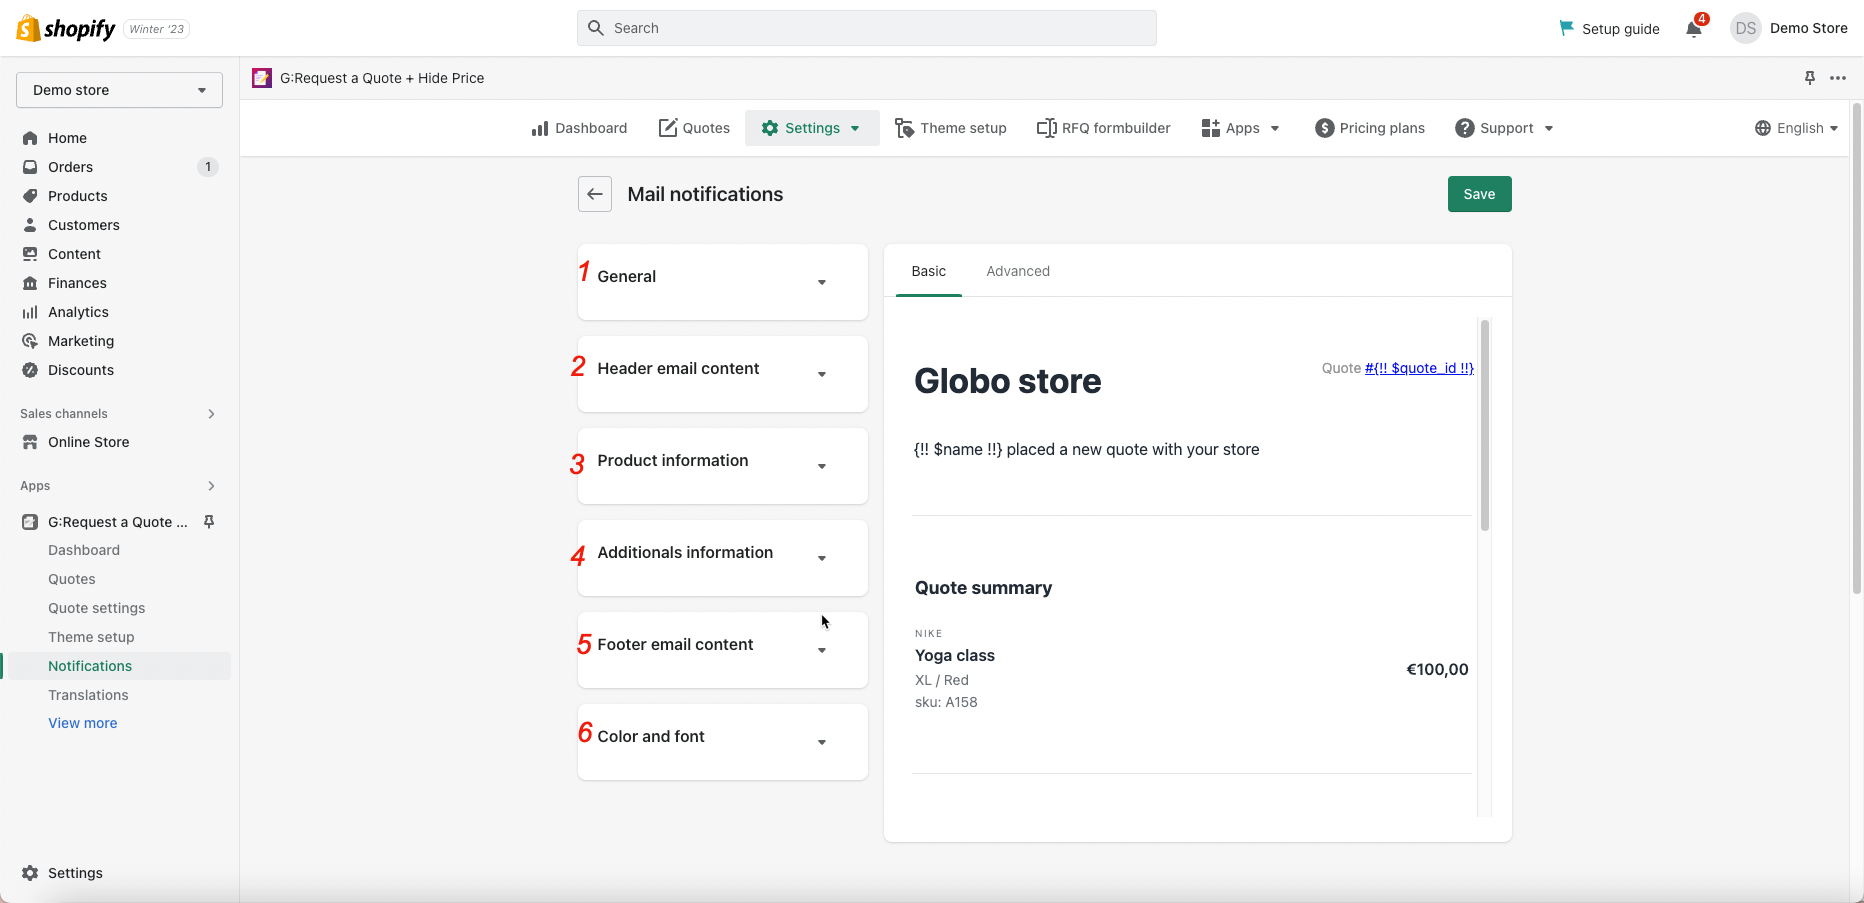
For more details, there are 6 sessions for admin to edit the email template as you wish.
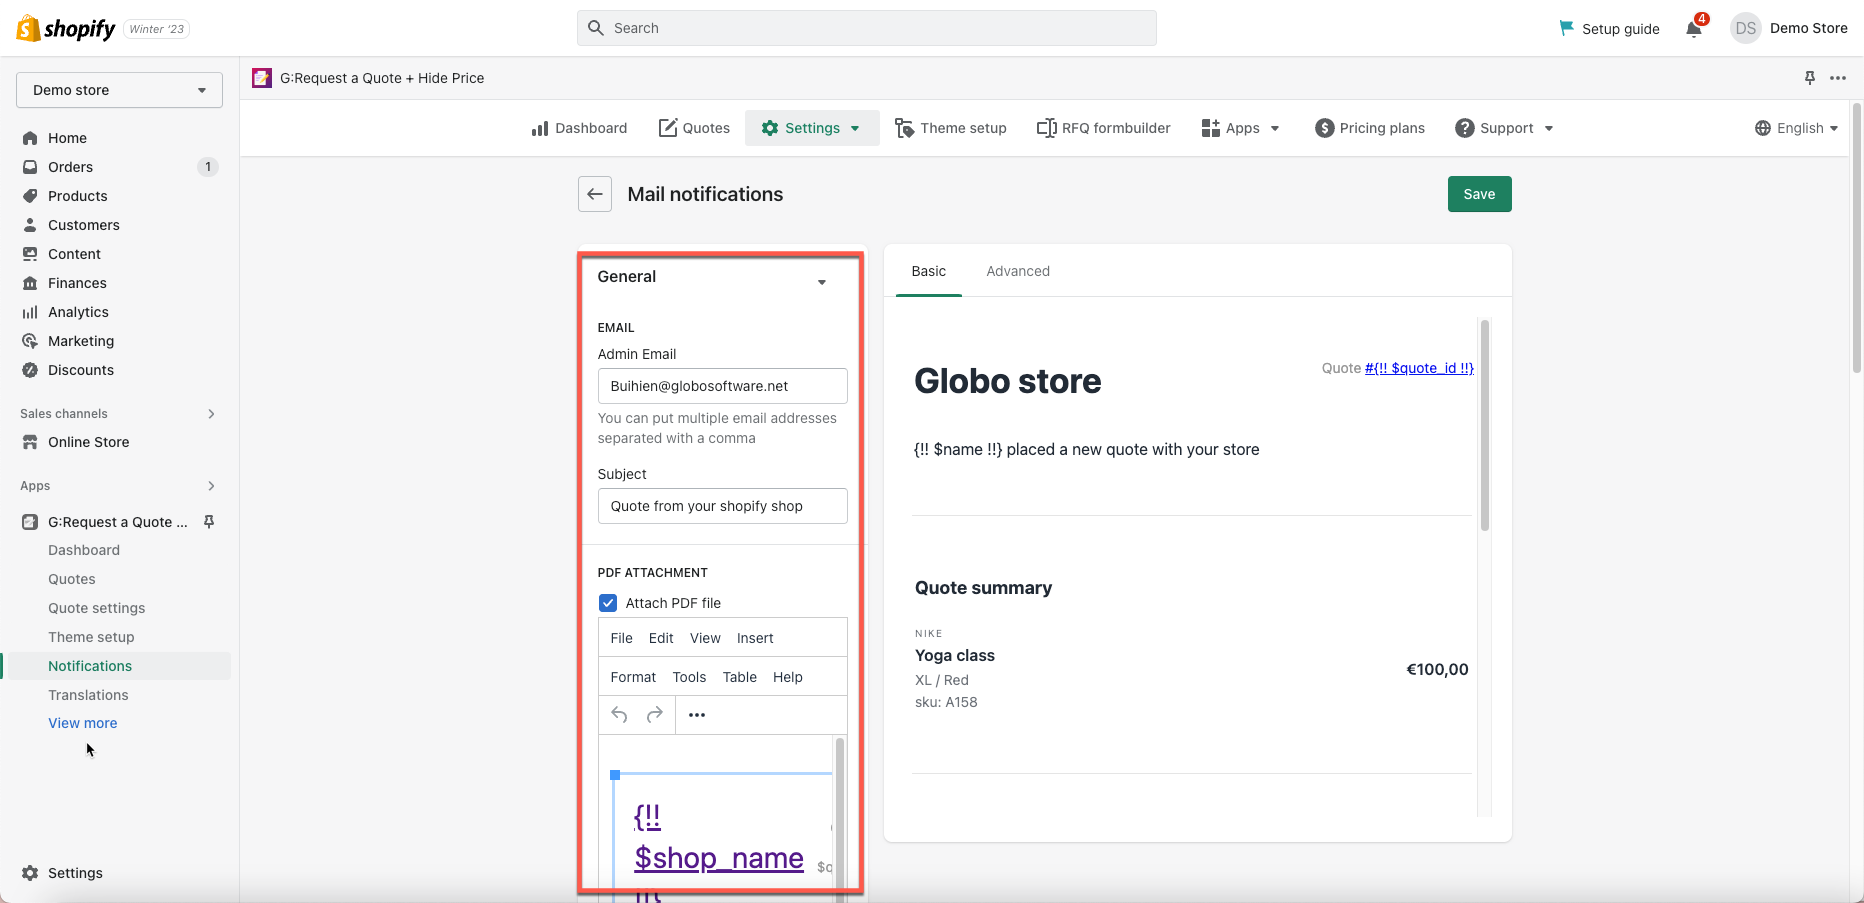
1. General
In this session, you can set up following parts:
- Admin Email: admin can add or change email addresses that receive quote notifications in this field.
Emails are sent by our email server by default. If you want to use your email address as sender instead, please set up SMTP. Learn more
- Subject: Admin enters the subject of this notification email.
- Attach PDF file: tick to this checkbox if you want to attach the quote as a PDF file in you email.
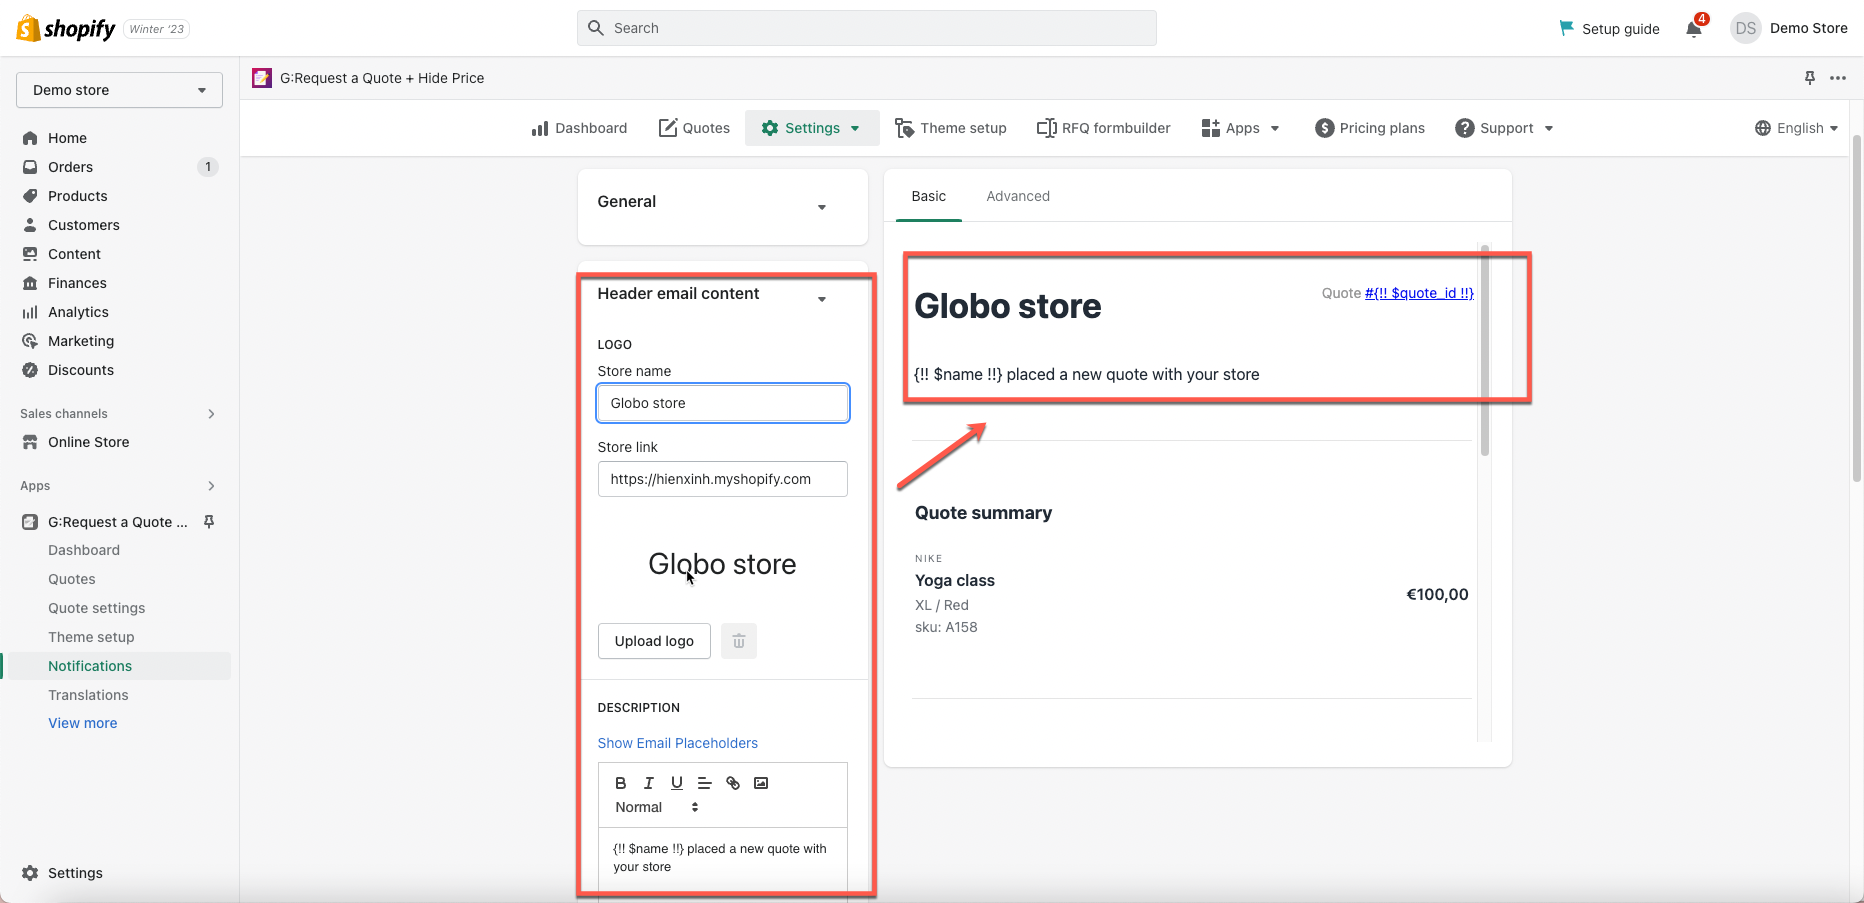
2. Header email content
- Enter Store name and Store link fields
- Click Upload photo to add the logo of the store
- Edit the DESCRIPTION part: you can use the available email placeholders in your email
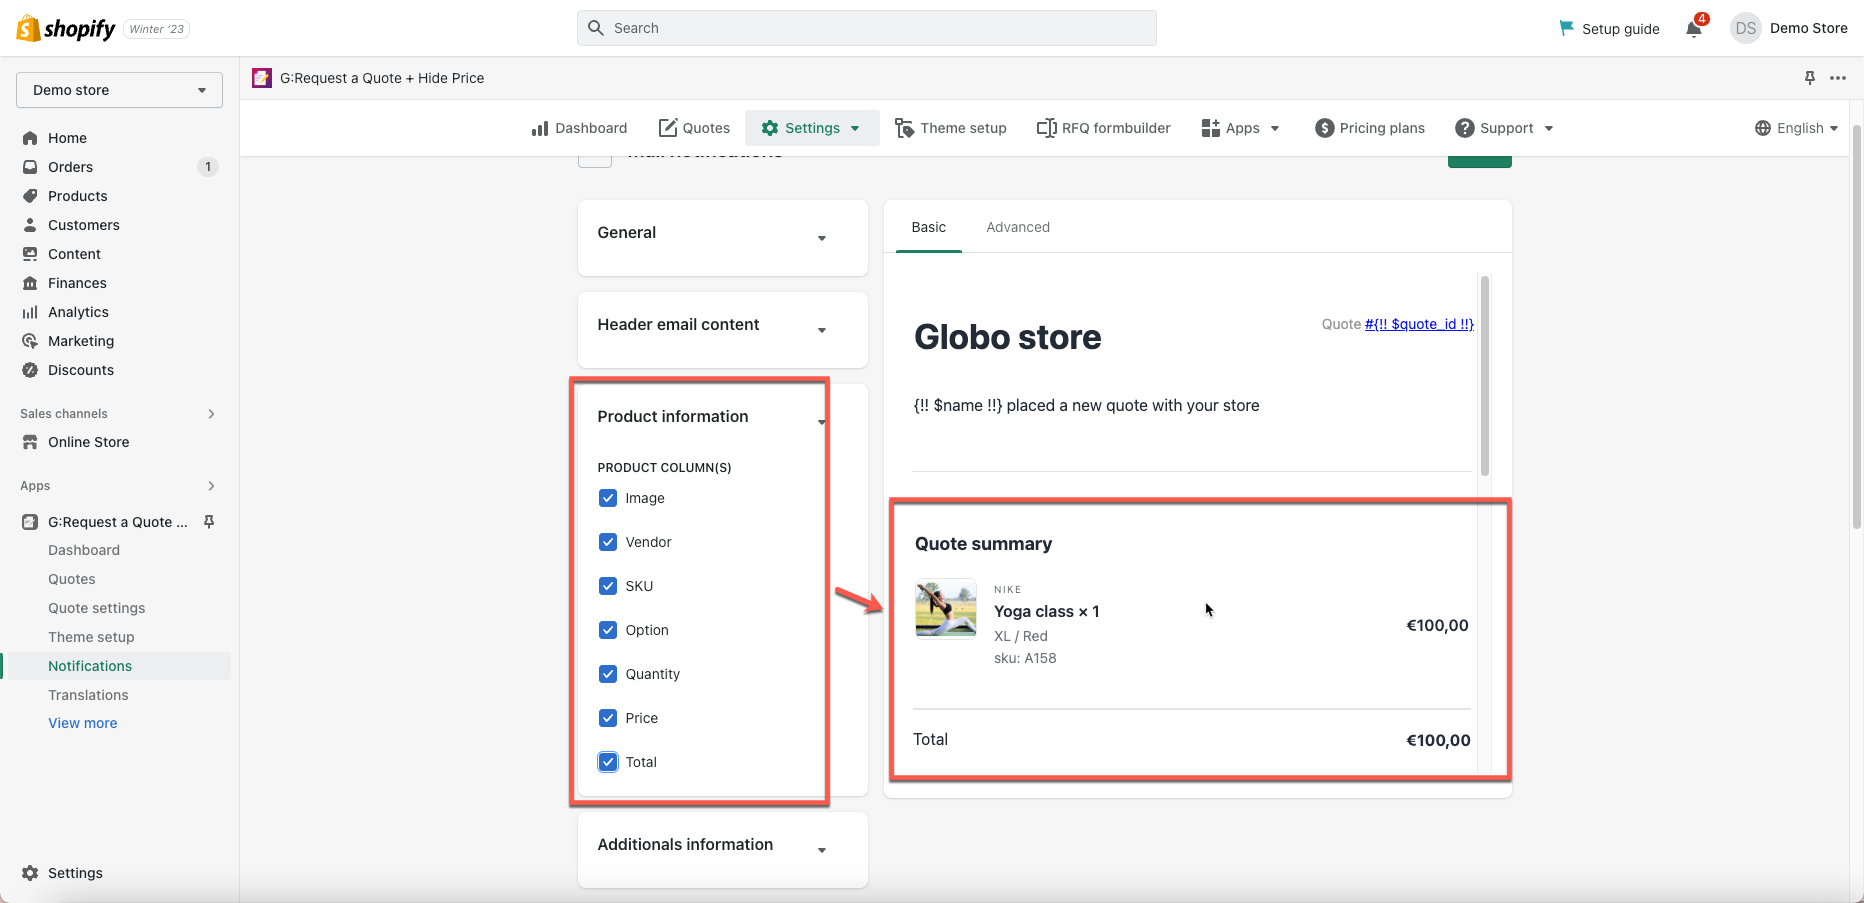
3. Product information
Tick to the checkbox of the available information you want to show in your email. They are:
- Product image
- Product Vendor
- Product SKU
- Product Options
- Product Quantity
- Product Price
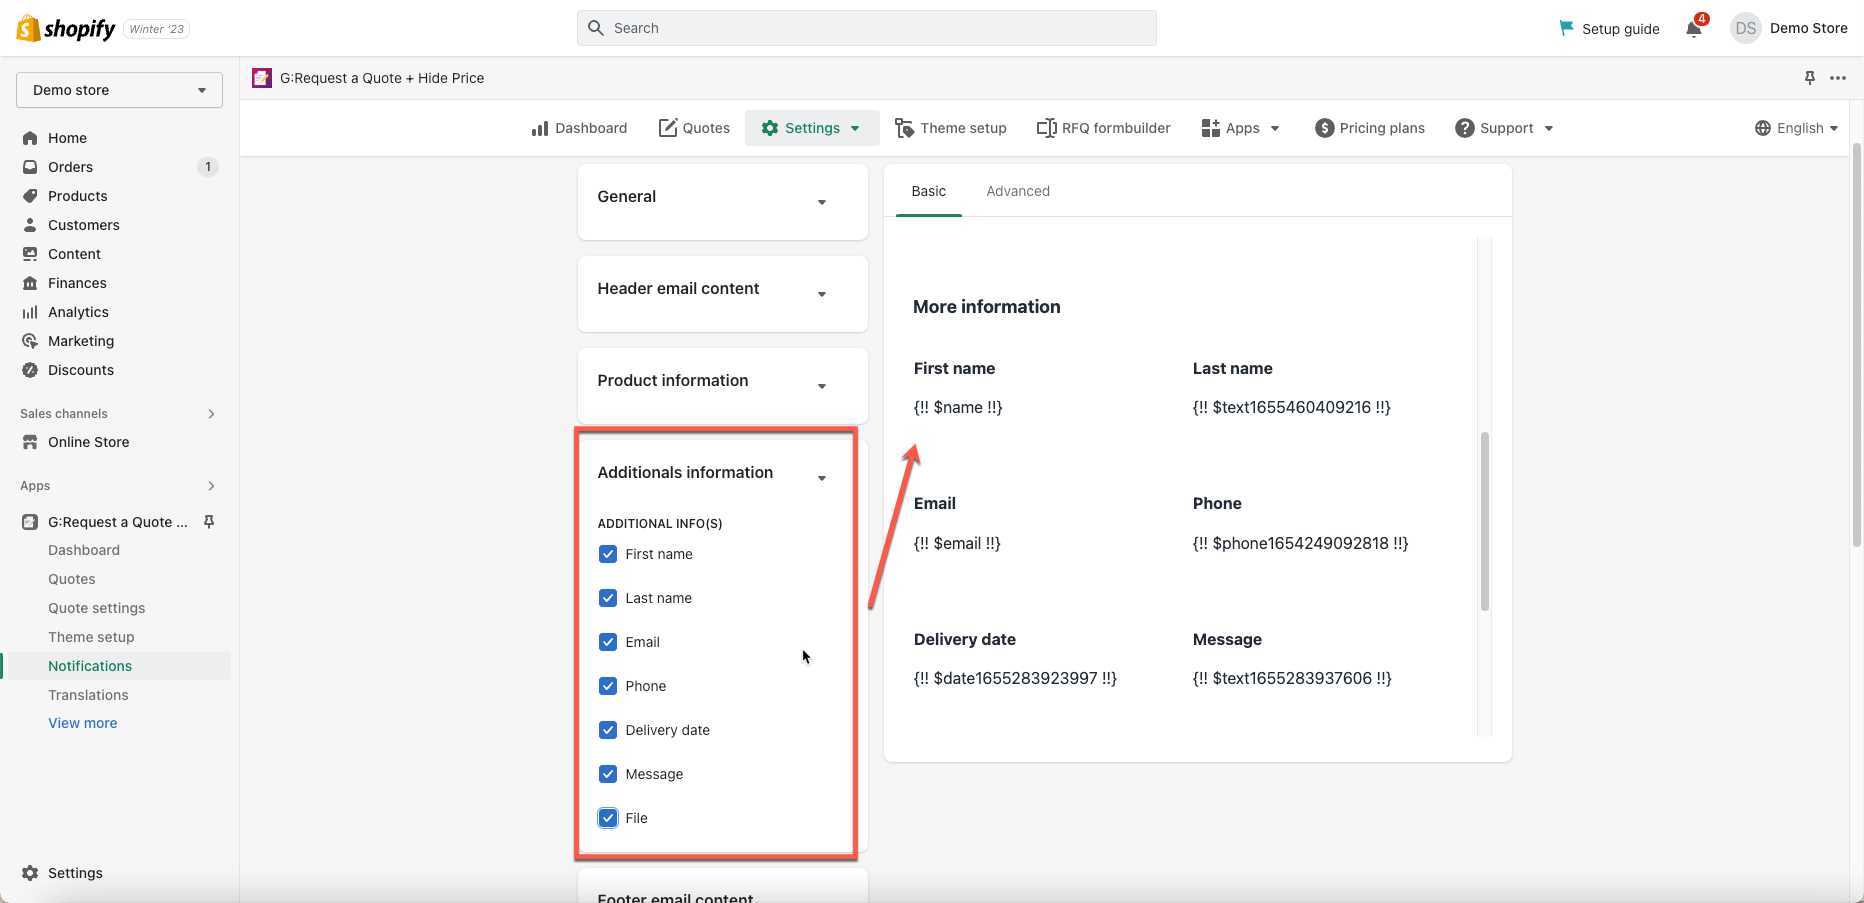
4. Additional information
Tick to checkbox to select the formbuilder fields you want to show in your email:
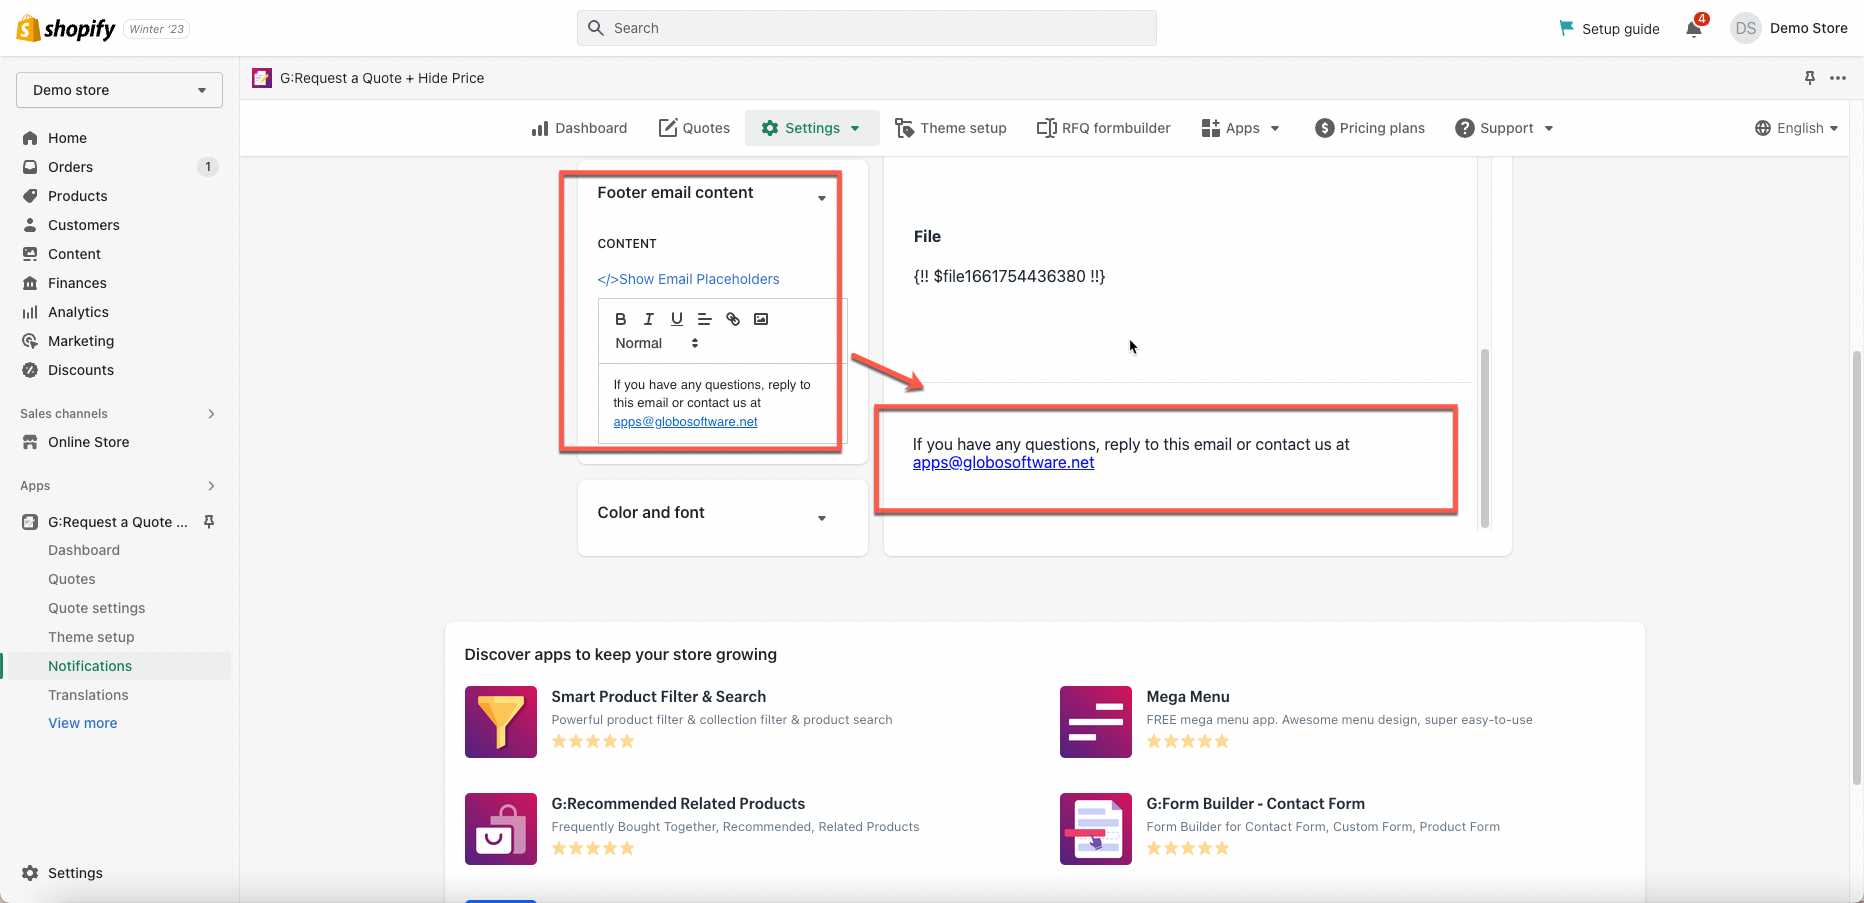
5. Footer email content
Edit the footer content as you want by using available email placeholders:
6. Color and font
- Drag and drop to adjust the Font size
- Click to choose the Text color and the Heading color you want

Advanced email template
- In app admin page, click Settings > Notifications > Email notifications
- Click Advanced tab to show the email template you want to edit
- Manually edit email template content on the right
- Click Show Email Placeholders > copy variables and add them to email template
- Custom CSS codes: put custom CSS codes for the email content (optional)
- Save template
For example:
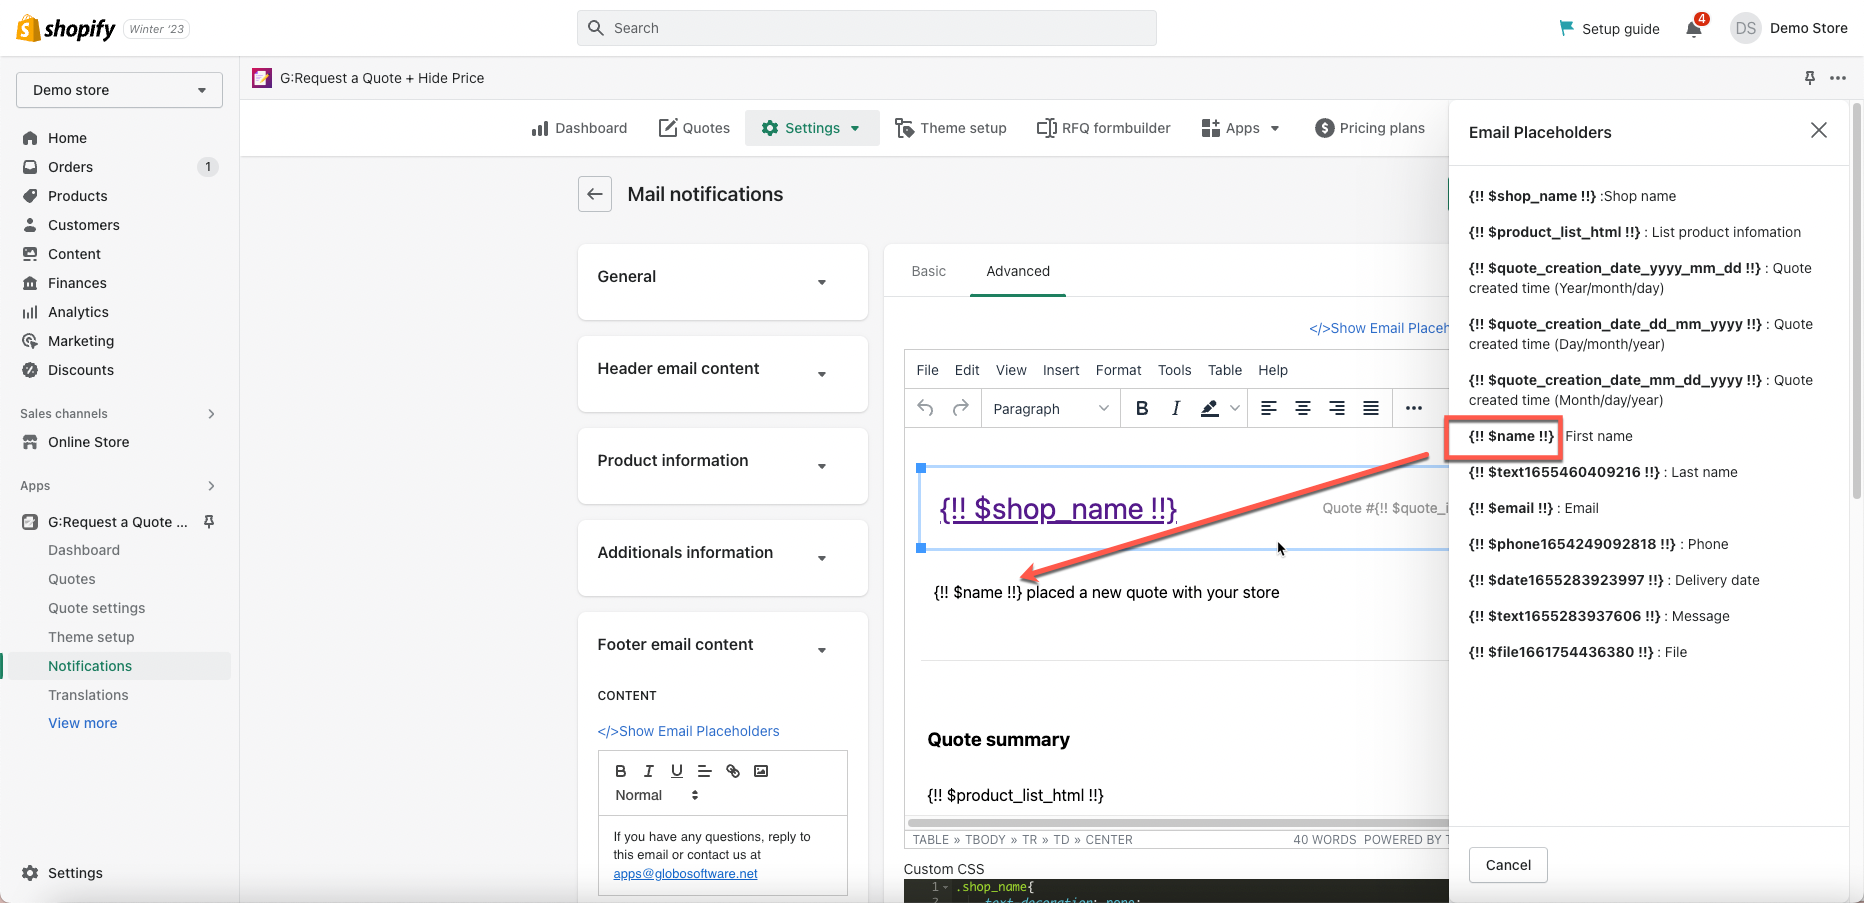
I want to show the customer name who has submitted the quote. In the image below, you can see variable {!! $name !!} : First name in the Email placeholders list.
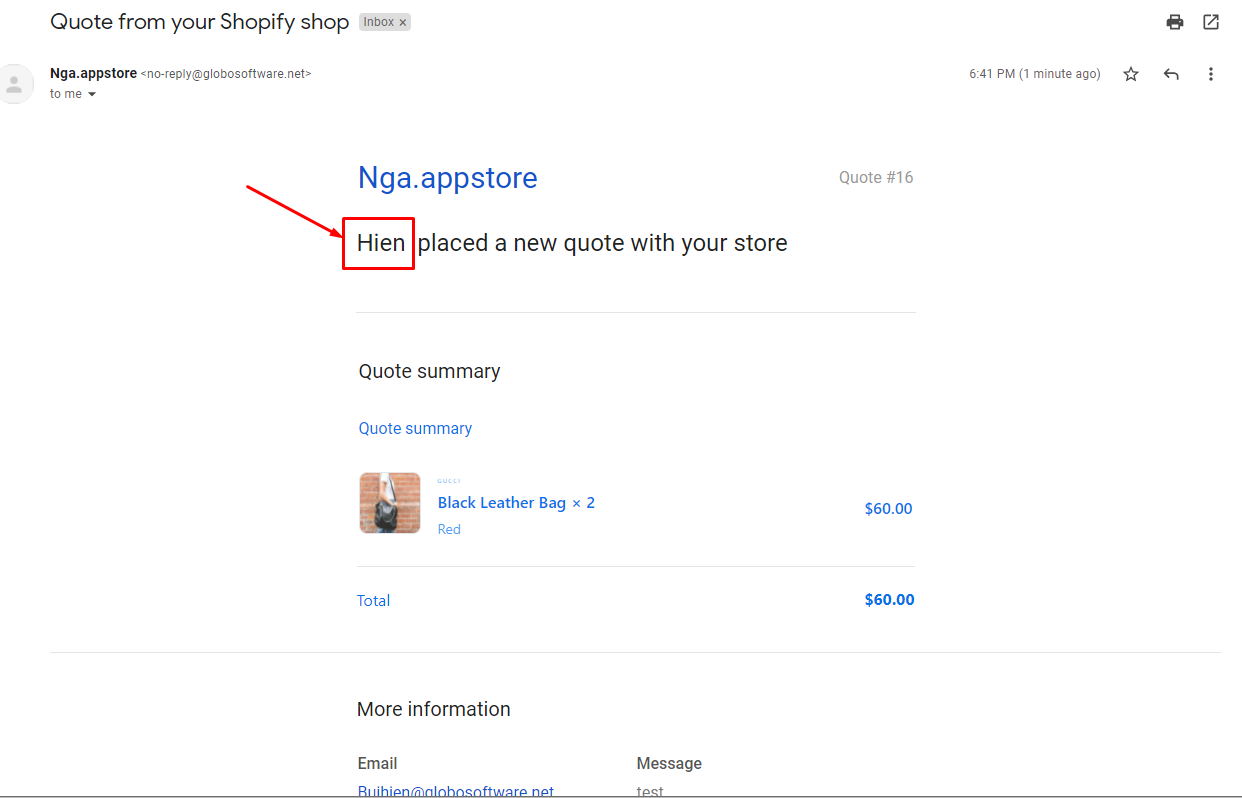
In Subject field and Body field, I use {!! $name !!} variable, this variable will be replaced with the name of the customer who has submitted your quote.
Set up SMTP as admin email
Setting SMTP is optional. If you do not configure this option, email notifications will be sent from our email server ([email protected]) by default
Please view this guide to learn more.
Configure Customer email template
Basic email template
- In app admin page, click Settings > Notifications > Email notifications
- Click Basic tab to show the email template you want to edit
- On the left side, enter your information and select options to add data to email template
- Save template
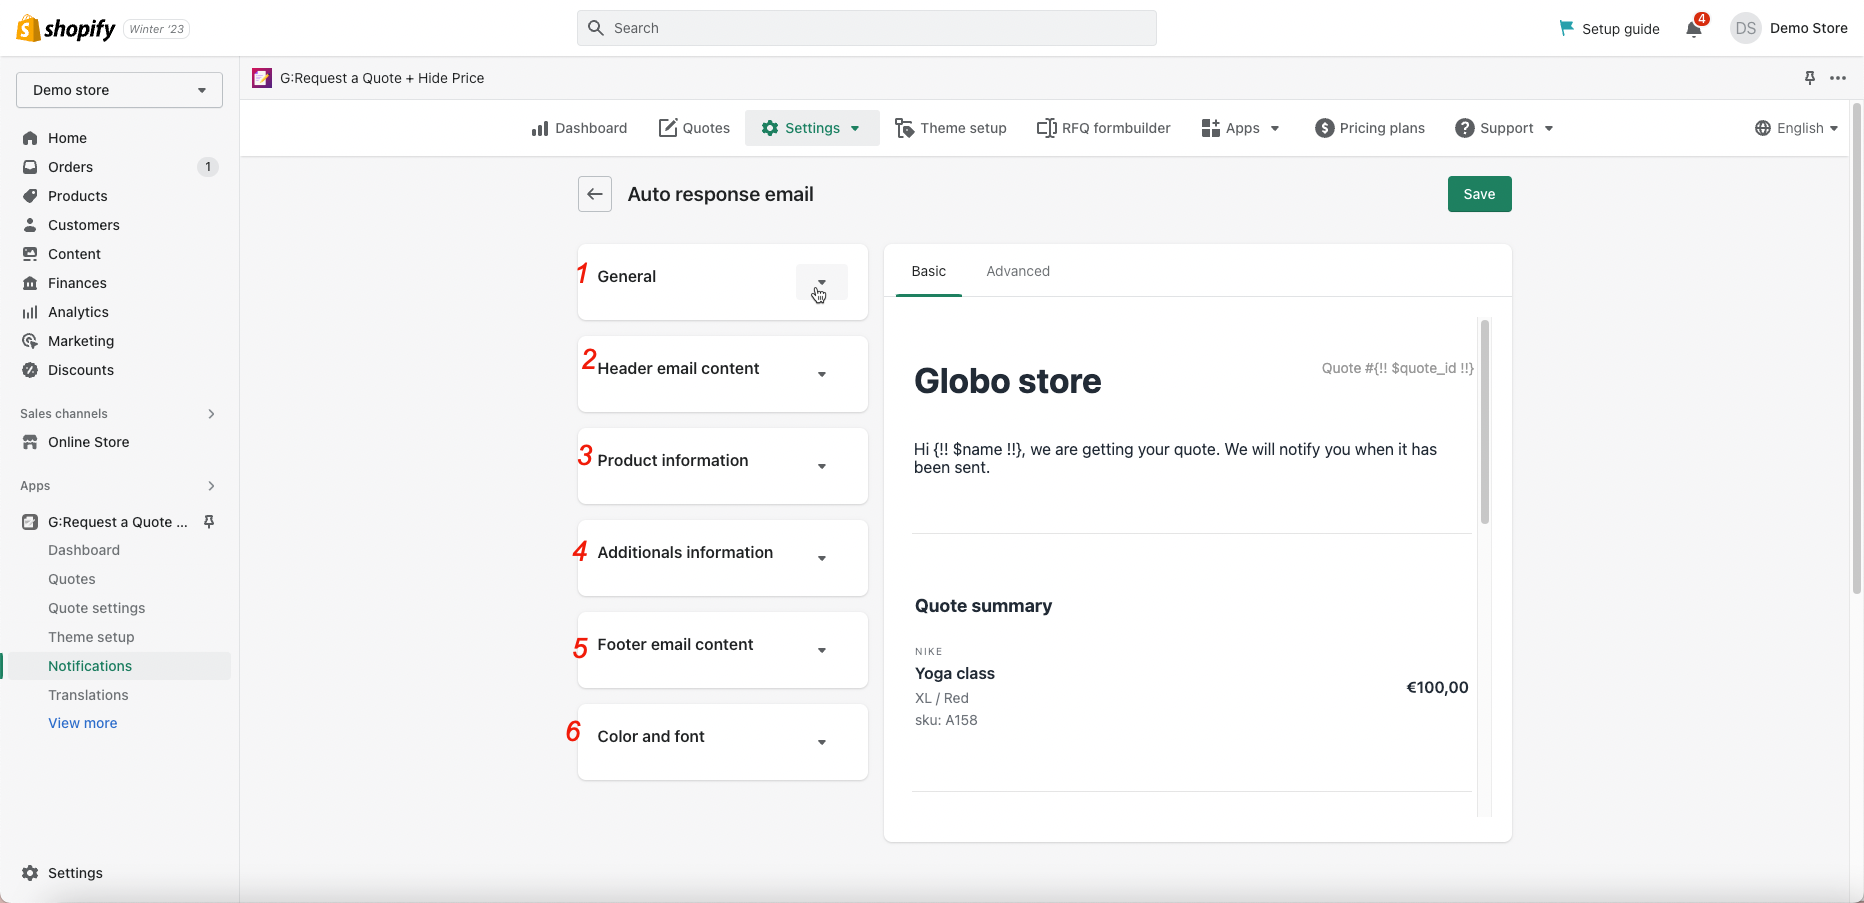
For more details, there are 6 sessions for admin to edit the email template as you wish.
1. General
In this session, you can set up following parts:
- Subject: admin enters the subject of email.
- Attach PDF file: tick to this checkbox if you want to attach the quote as a PDF file and send it to customers.
2. Header email content
- Enter Store name and Store link fields
- Click Upload photo to add the logo of the store
- Edit the DESCRIPTION part: you can use the available email placeholders in your email
3. Product information
Tick to the checkbox of the available information you want to show in email. They are:
- Product image
- Product Vendor
- Product SKU
- Product Options
- Product Quantity
- Product Price
4. Additional information
Tick to checkbox to select the formbuilder fields you want to show in email:
5. Footer email content
Edit the footer content as you want by using available email placeholders
6. Color and font
- Drag and drop to adjust the Font size
- Click to choose the Text color and the Heading color you want
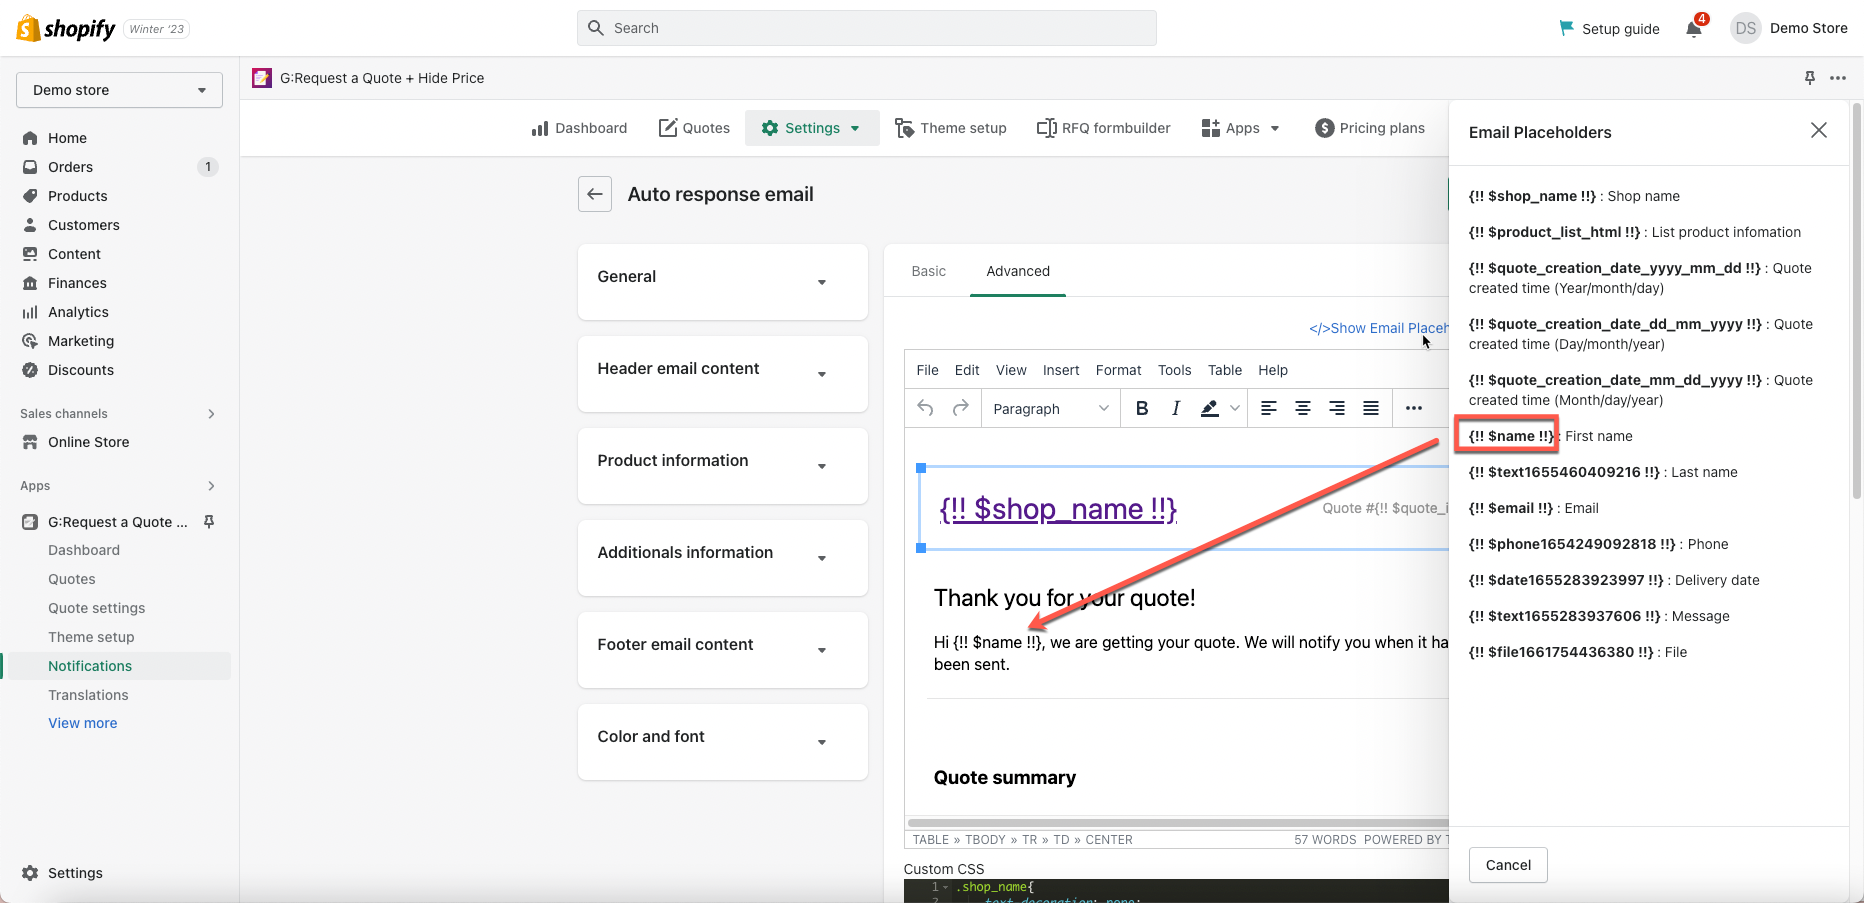
Advanced email template
- In app admin page, click Settings > Auto response email > Basic template
- Manually edit email template content
- Click Show Email Placeholders > copy variables and add them to email template
- Custom CSS codes: put custom CSS codes for the email content (optional)
- Save template
For example:
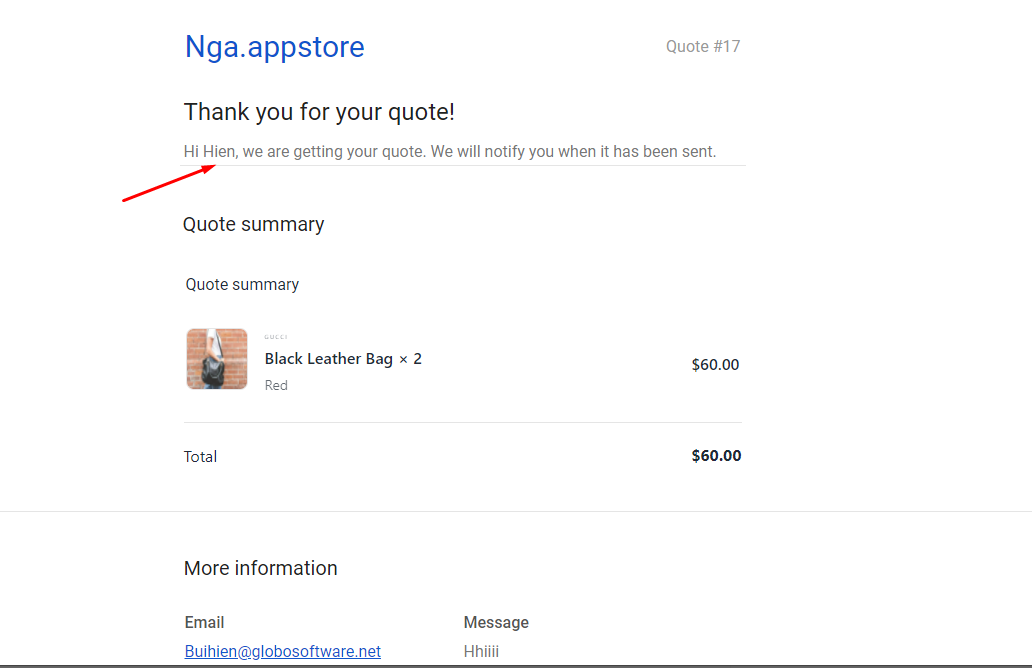
I want to show the customer name who has submitted the quote. In the image below, you can see variable {!! $name !!} in the Email placeholders list.
In Subject field and Body field, I use {!! $name !!} variable, this variable will be replaced with the name of the customer who has submitted your quote.
If you do encounter any difficulty while proceeding these steps, don’t show any hesitation to contact us promptly via the email address [email protected]