


- This is an optional setting. If you set up SMTP, the email notification will be sent from your own email address.
- If you do not configure this option, email notifications will be sent from our email server ([email protected]) by default
- Our app currently only support Google and Outlook SMTP. For other email providers, you can configure API. Learn more about API configure in the app.
Below is an example of Google SMTP.
Steps to manage
Step 1: Log into your Google account
First, log into your Google account here

Step 2: Enabling 2-Step Verification
To make sure that your Google account is well protected to avoid any intervention when using the SMTP service; therefore, we recommend enabling the 2-step verification offered by Google.
Here is the guide for you: Enabling 2-Step Verification
If you have already enabled the 2-step verification, then you may jump to Step 3 below.
Step 3: Generate App Password
- Then click here to generate App password
- Select Other/Custom name from Select App, give it a name such as “DO – Production Server” and then click Generate.
- Note down the application password as it will be required in the next step.


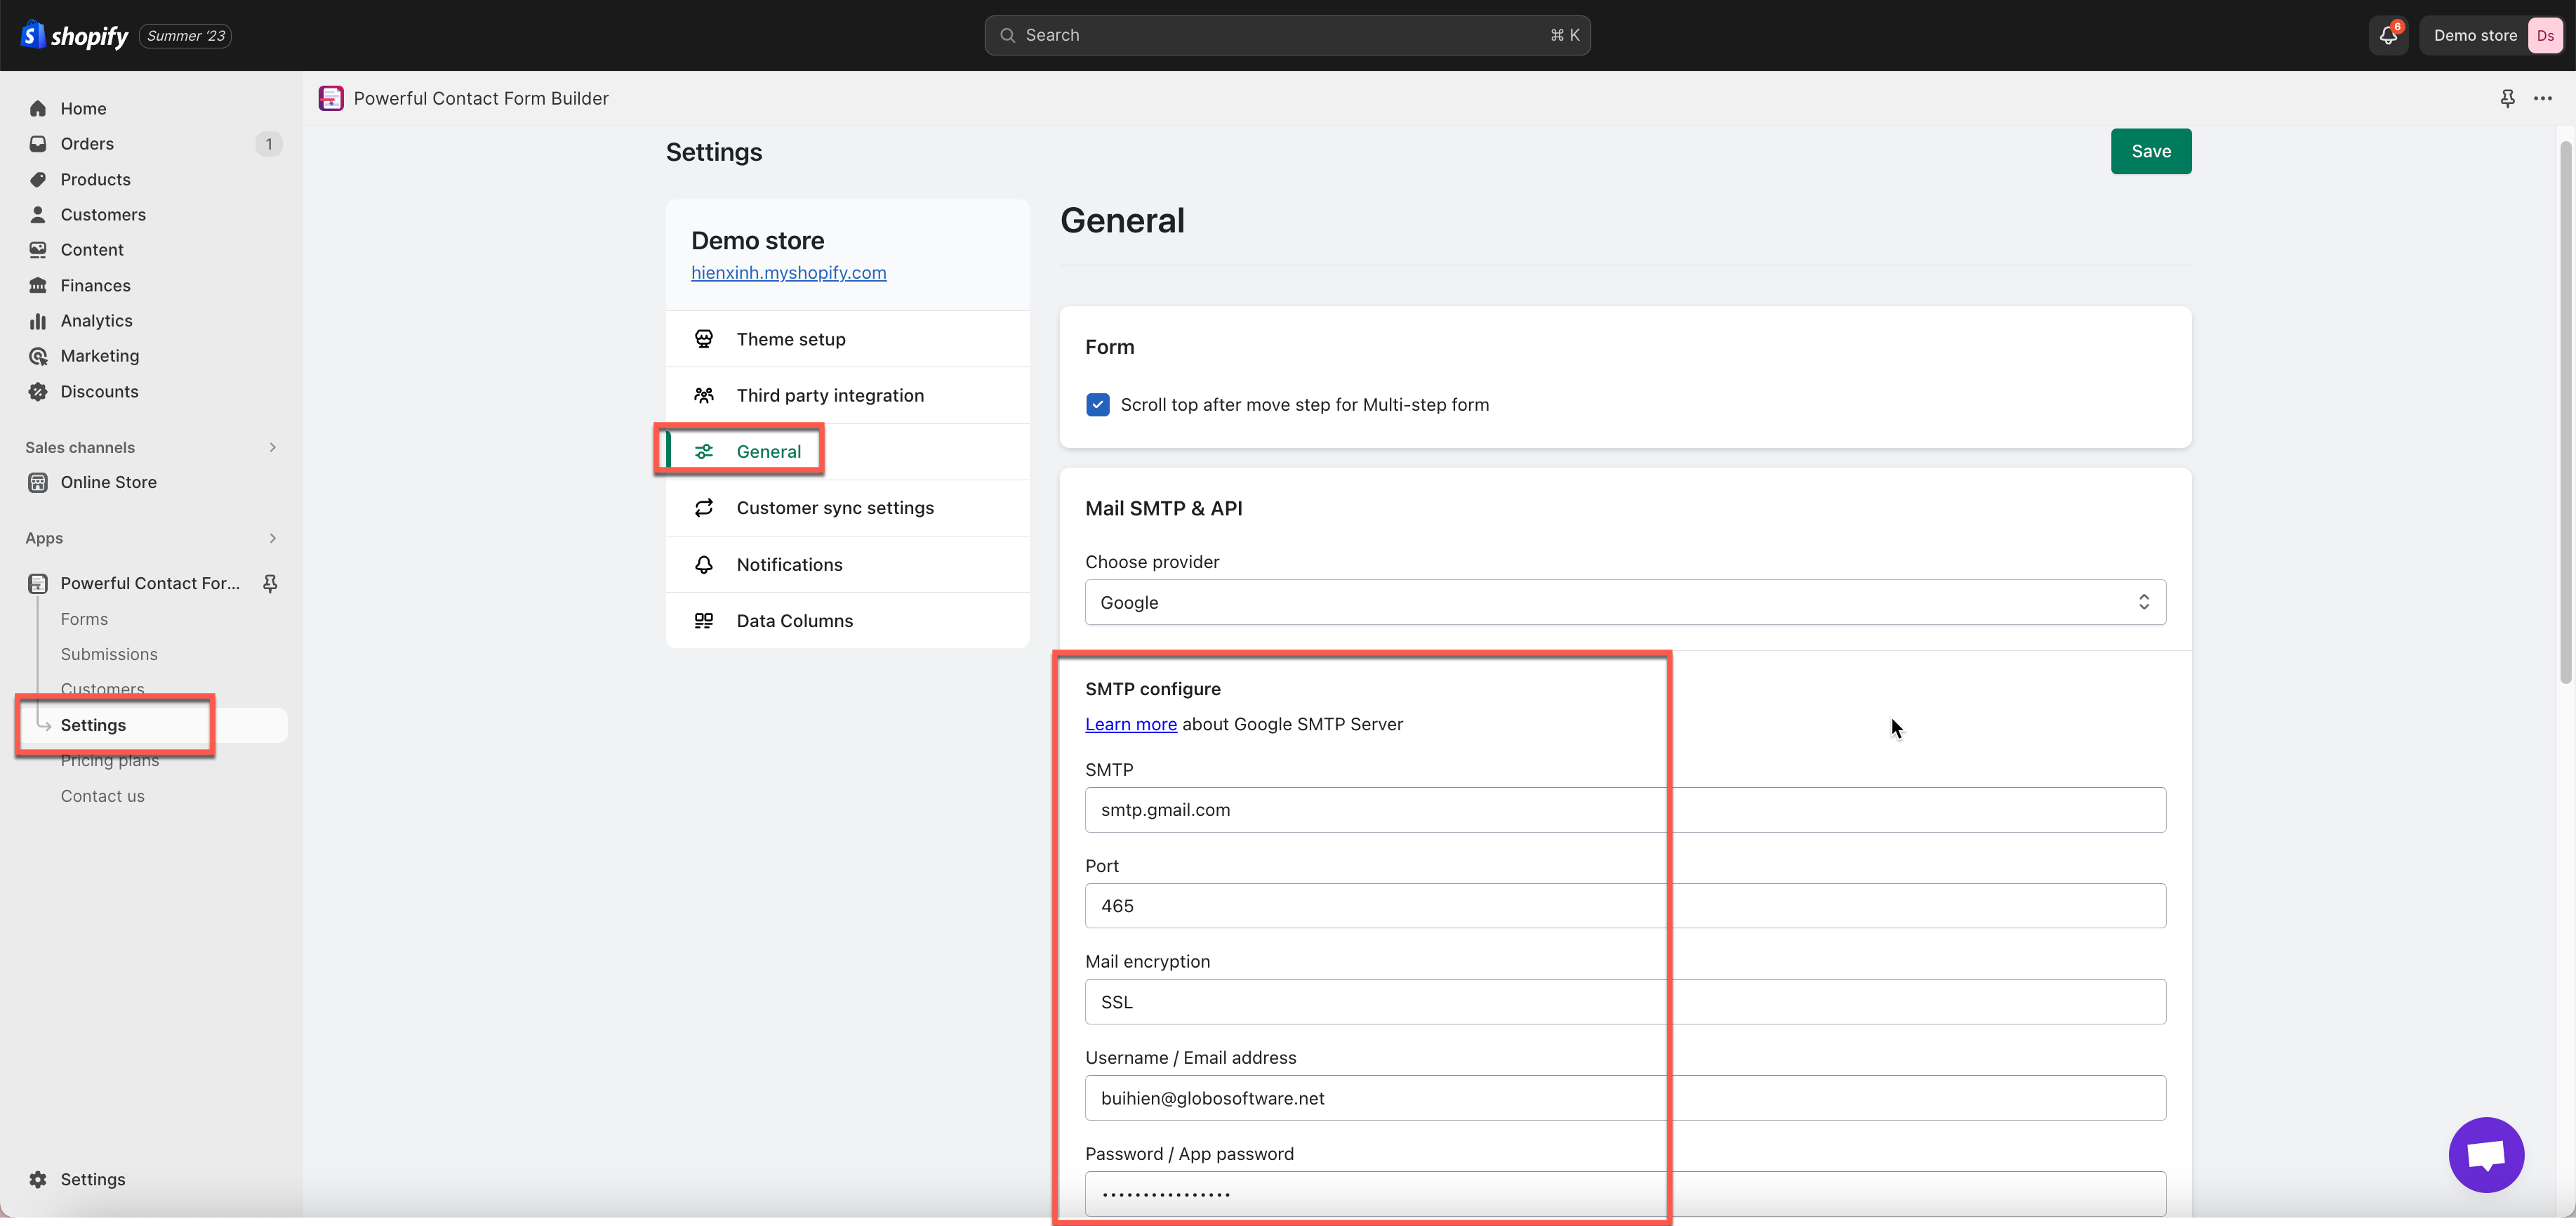
Step 3: Configure Gmail on the SMTP Add-on
- From the admin page of Globo Form builder app > click Settings > General
- In Mail SMTP & API session > select one email provider in Choose provider dropdown and set up the SMTP configuration
- Click Save to update the setting
- Send a test email to check if it works for you
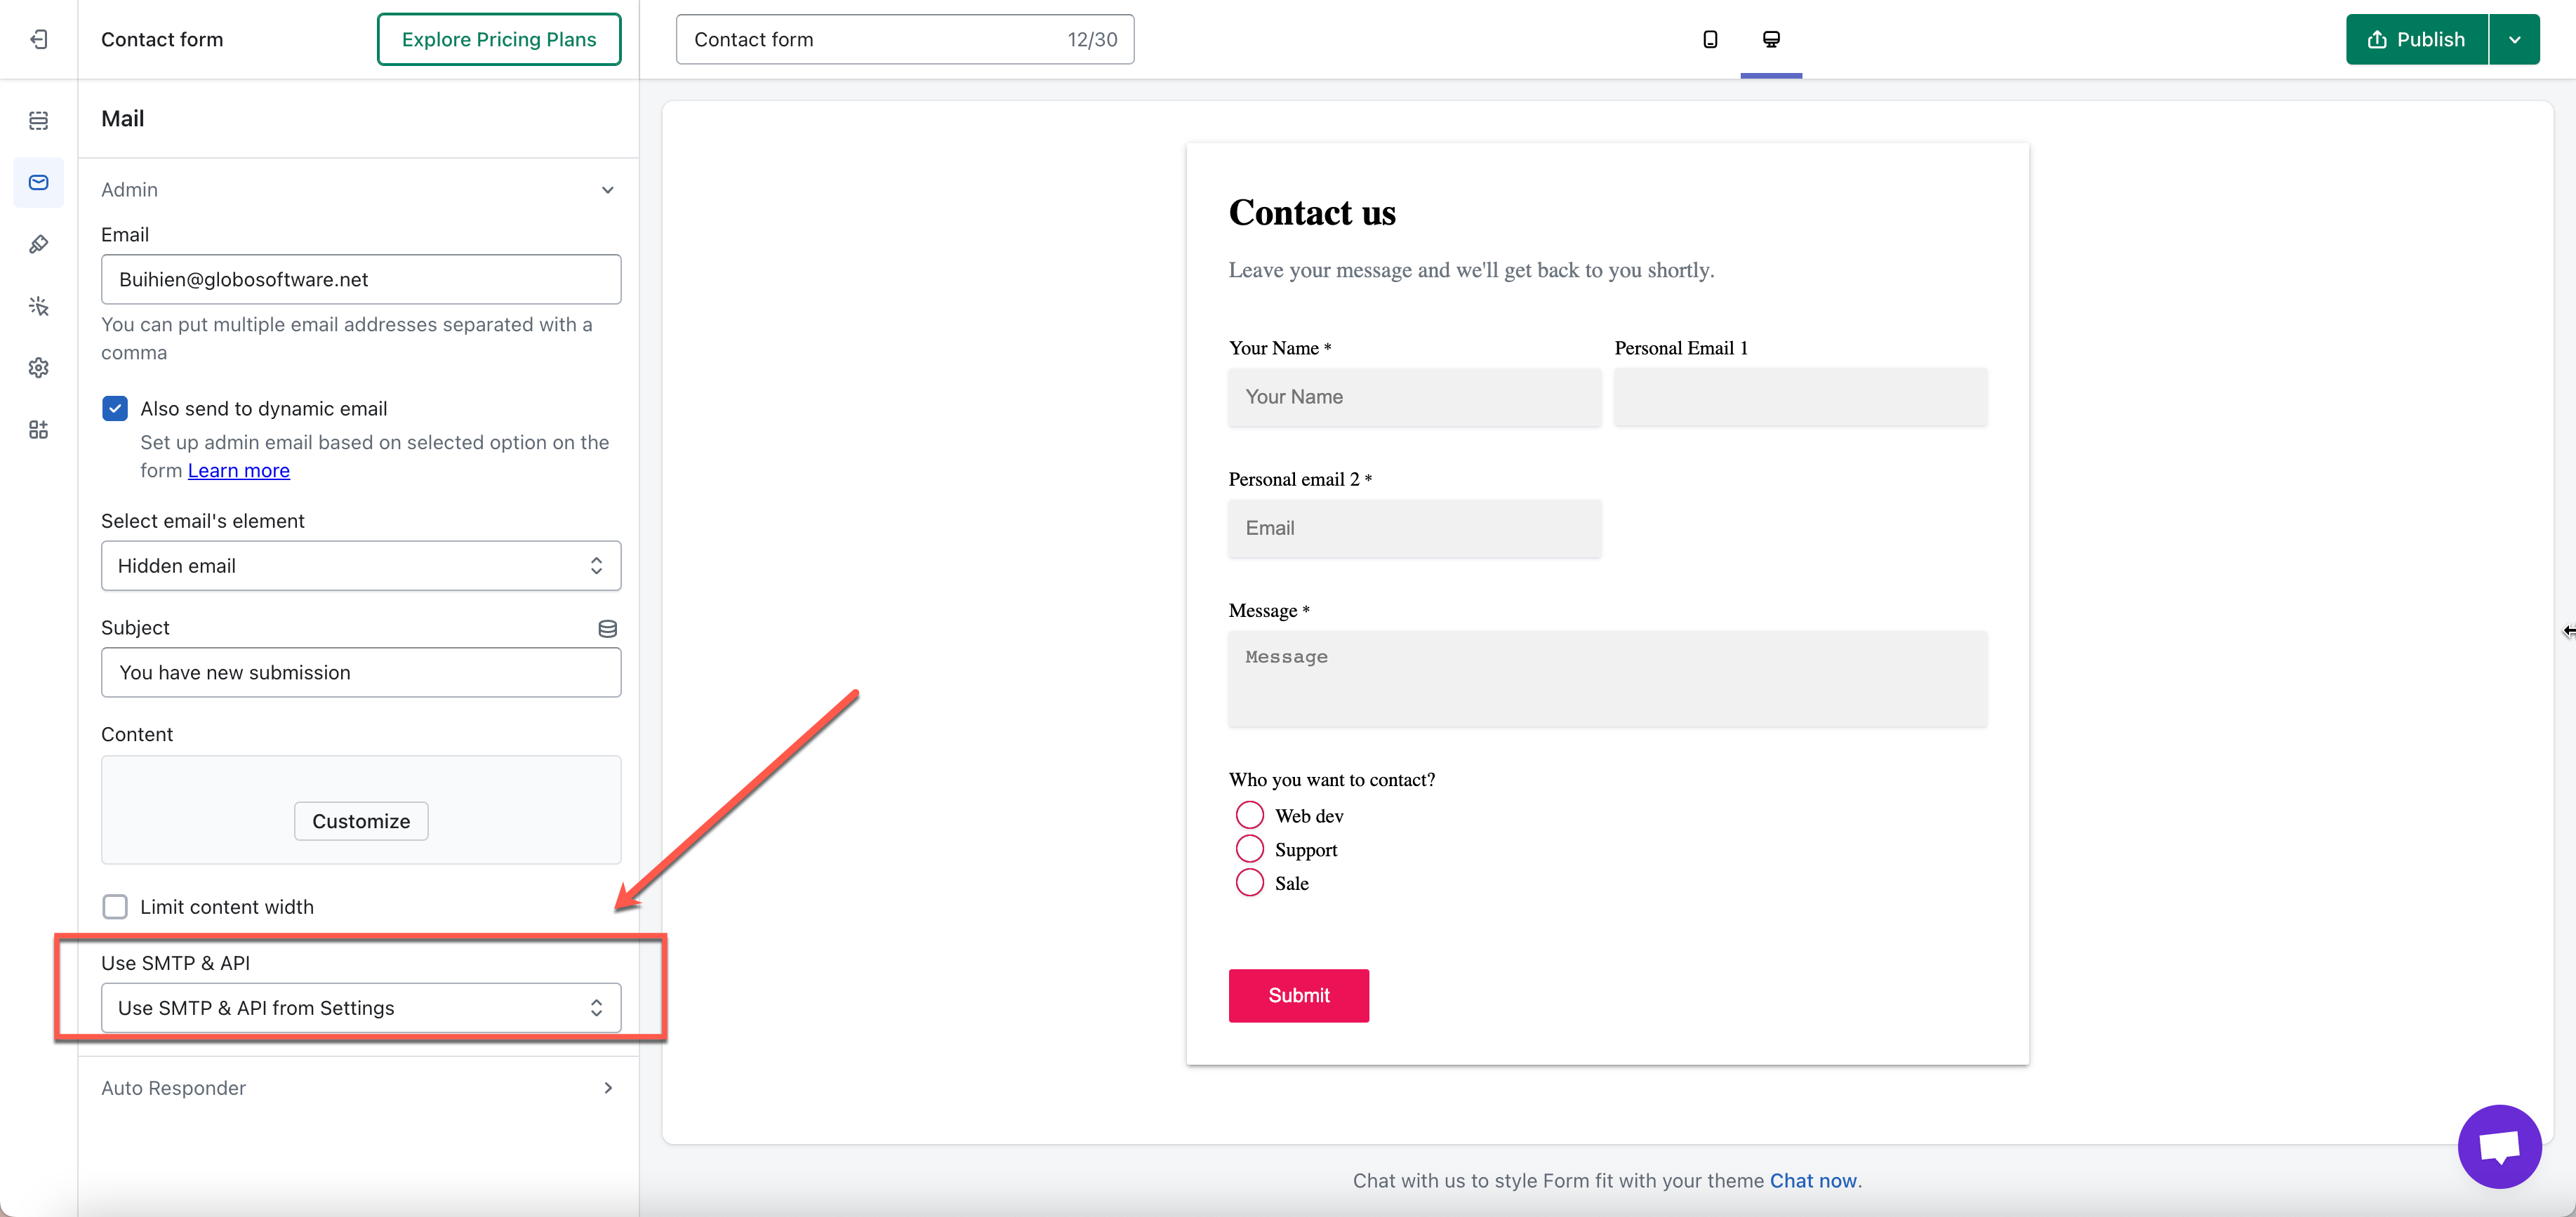
- Go to the Forms tab of the app, open the form you want
- In the form config, click Mail icon on the left side> click Admin > scroll down to Use SMTP & API > select Use SMTP & API from Settings
- Click Save
The SMTP configuration incudes the below parts.
(1) Choose provider
An email provider basically is a provider of email hosting. It implements email servers to send, receive, accept and store email for other organisations or end users on their behalf.
You can select one of them: Google, Sendinblue, SendGrid, Outlook, Pepipost, AmazonESE, Elastic, Mailgun, Zoho.
The provider we recommend ton work with our app best is Google.
(2) Enter SMTP host: enter smtp.gmail.com as your host if you use Google account,
(3) Port – Use port 465
(4) User name/Email address: enter your Gmail login username [email protected]
(5) Enter your App password (generated in step 2 above)
(6) Send email from another email address (optional). Learn more
Please see the screenshot for reference.

Note:
- App password in step 5 is the app password generated in Step #2 above. It’s NOT your Gmail account password.
- Remember to Save the configuration before sending test email
- If you are using another email service provider (not Gmail), please set up based on your own account.
If you do encounter any difficulty while proceeding these steps, don’t show any hesitation to contact us promptly via the email address [email protected]
We are always willing to help with all sincerity!