


Overview
A shipping profile is a set of shipping rules for specific products and locations. You can use the default general shipping profile for all your products or create custom shipping profiles for specific products.
You can know more about show Shopify Shipping profiles work here.
There are 2 types of shipping profiles: General and Custom shipping profile
General shipping profile
Each Shopify store comes with a general shipping profile by default.
If you want to have the same shipping rates for all your products, then the general profile might be sufficient for your store’s shipping setup. All your existing and new products are added to the general shipping profile.
If a product or variant isn’t in a custom profile, then it uses the general shipping rates in your general profile.
Custom shipping profile
If the general shipping profile isn’t enough for your business and you want to have different shipping rates for different products, then you can create up to 99 custom shipping profiles.
For example, if you sell a few products that are fragile and need more expensive shipping options, then you can create a shipping profile for these fragile products and charge different shipping rates than the rest of your products.
Setting up Delivery Profiles for selling plans
Set up your general shipping profile
Steps to manage
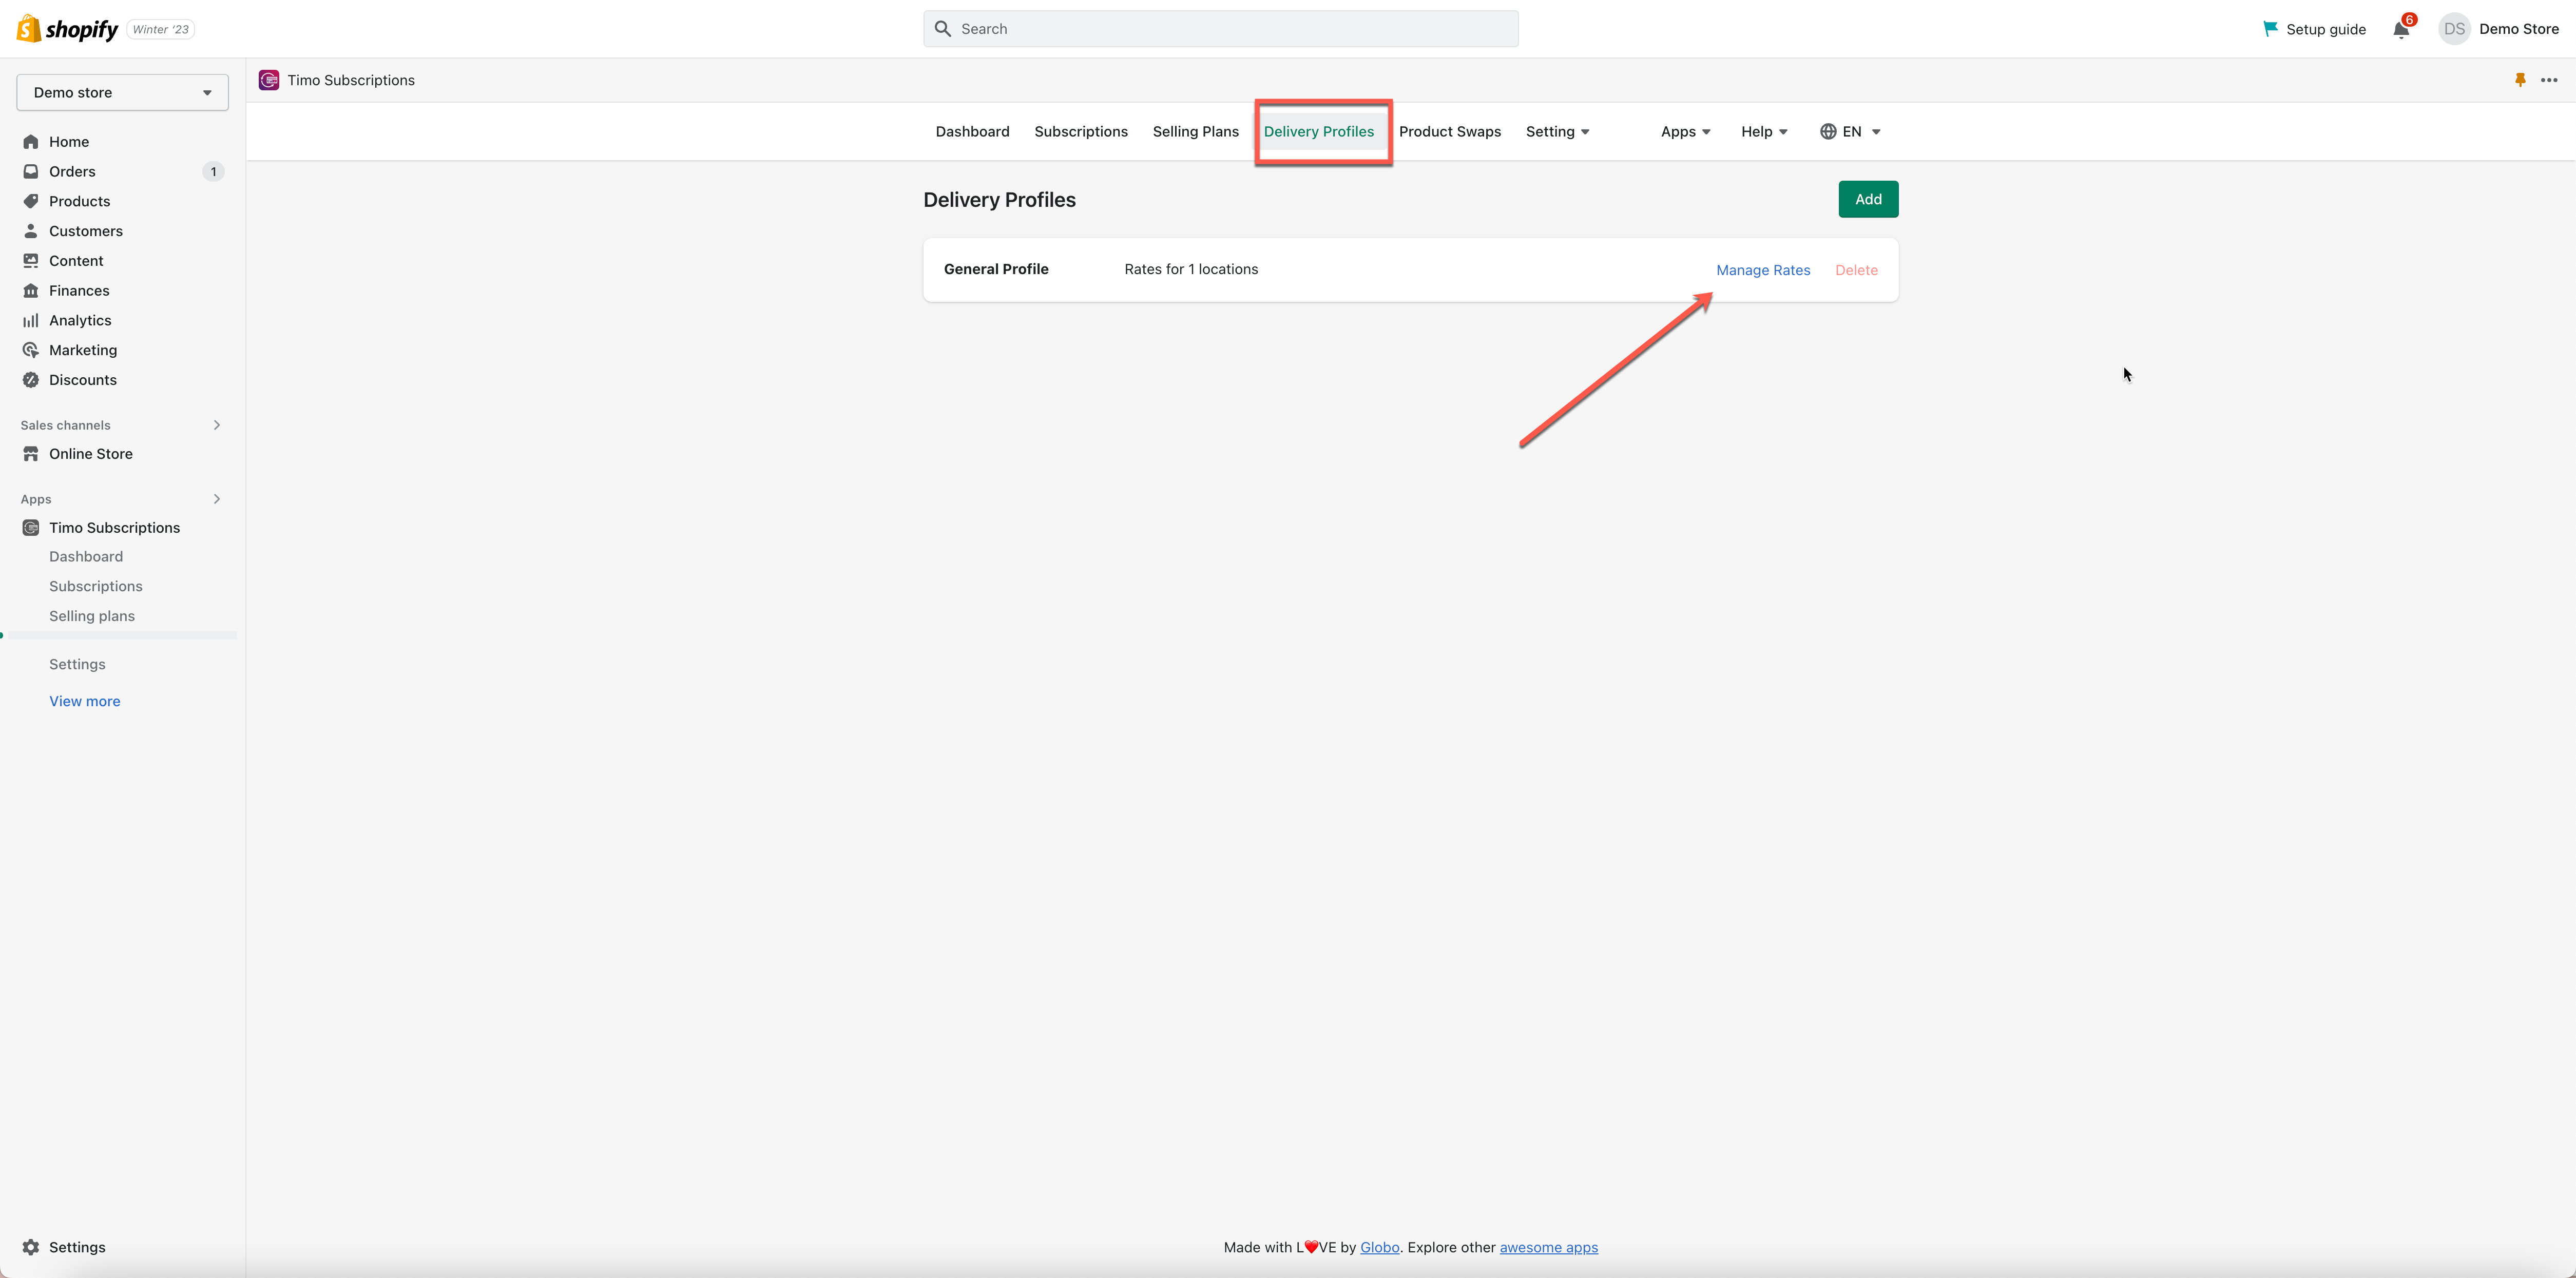
- From app admin page, click Delivery Profiles
- By default, there is a General Profile > click Manage rates > direct to the Shopify Shipping and Delivery > General profile
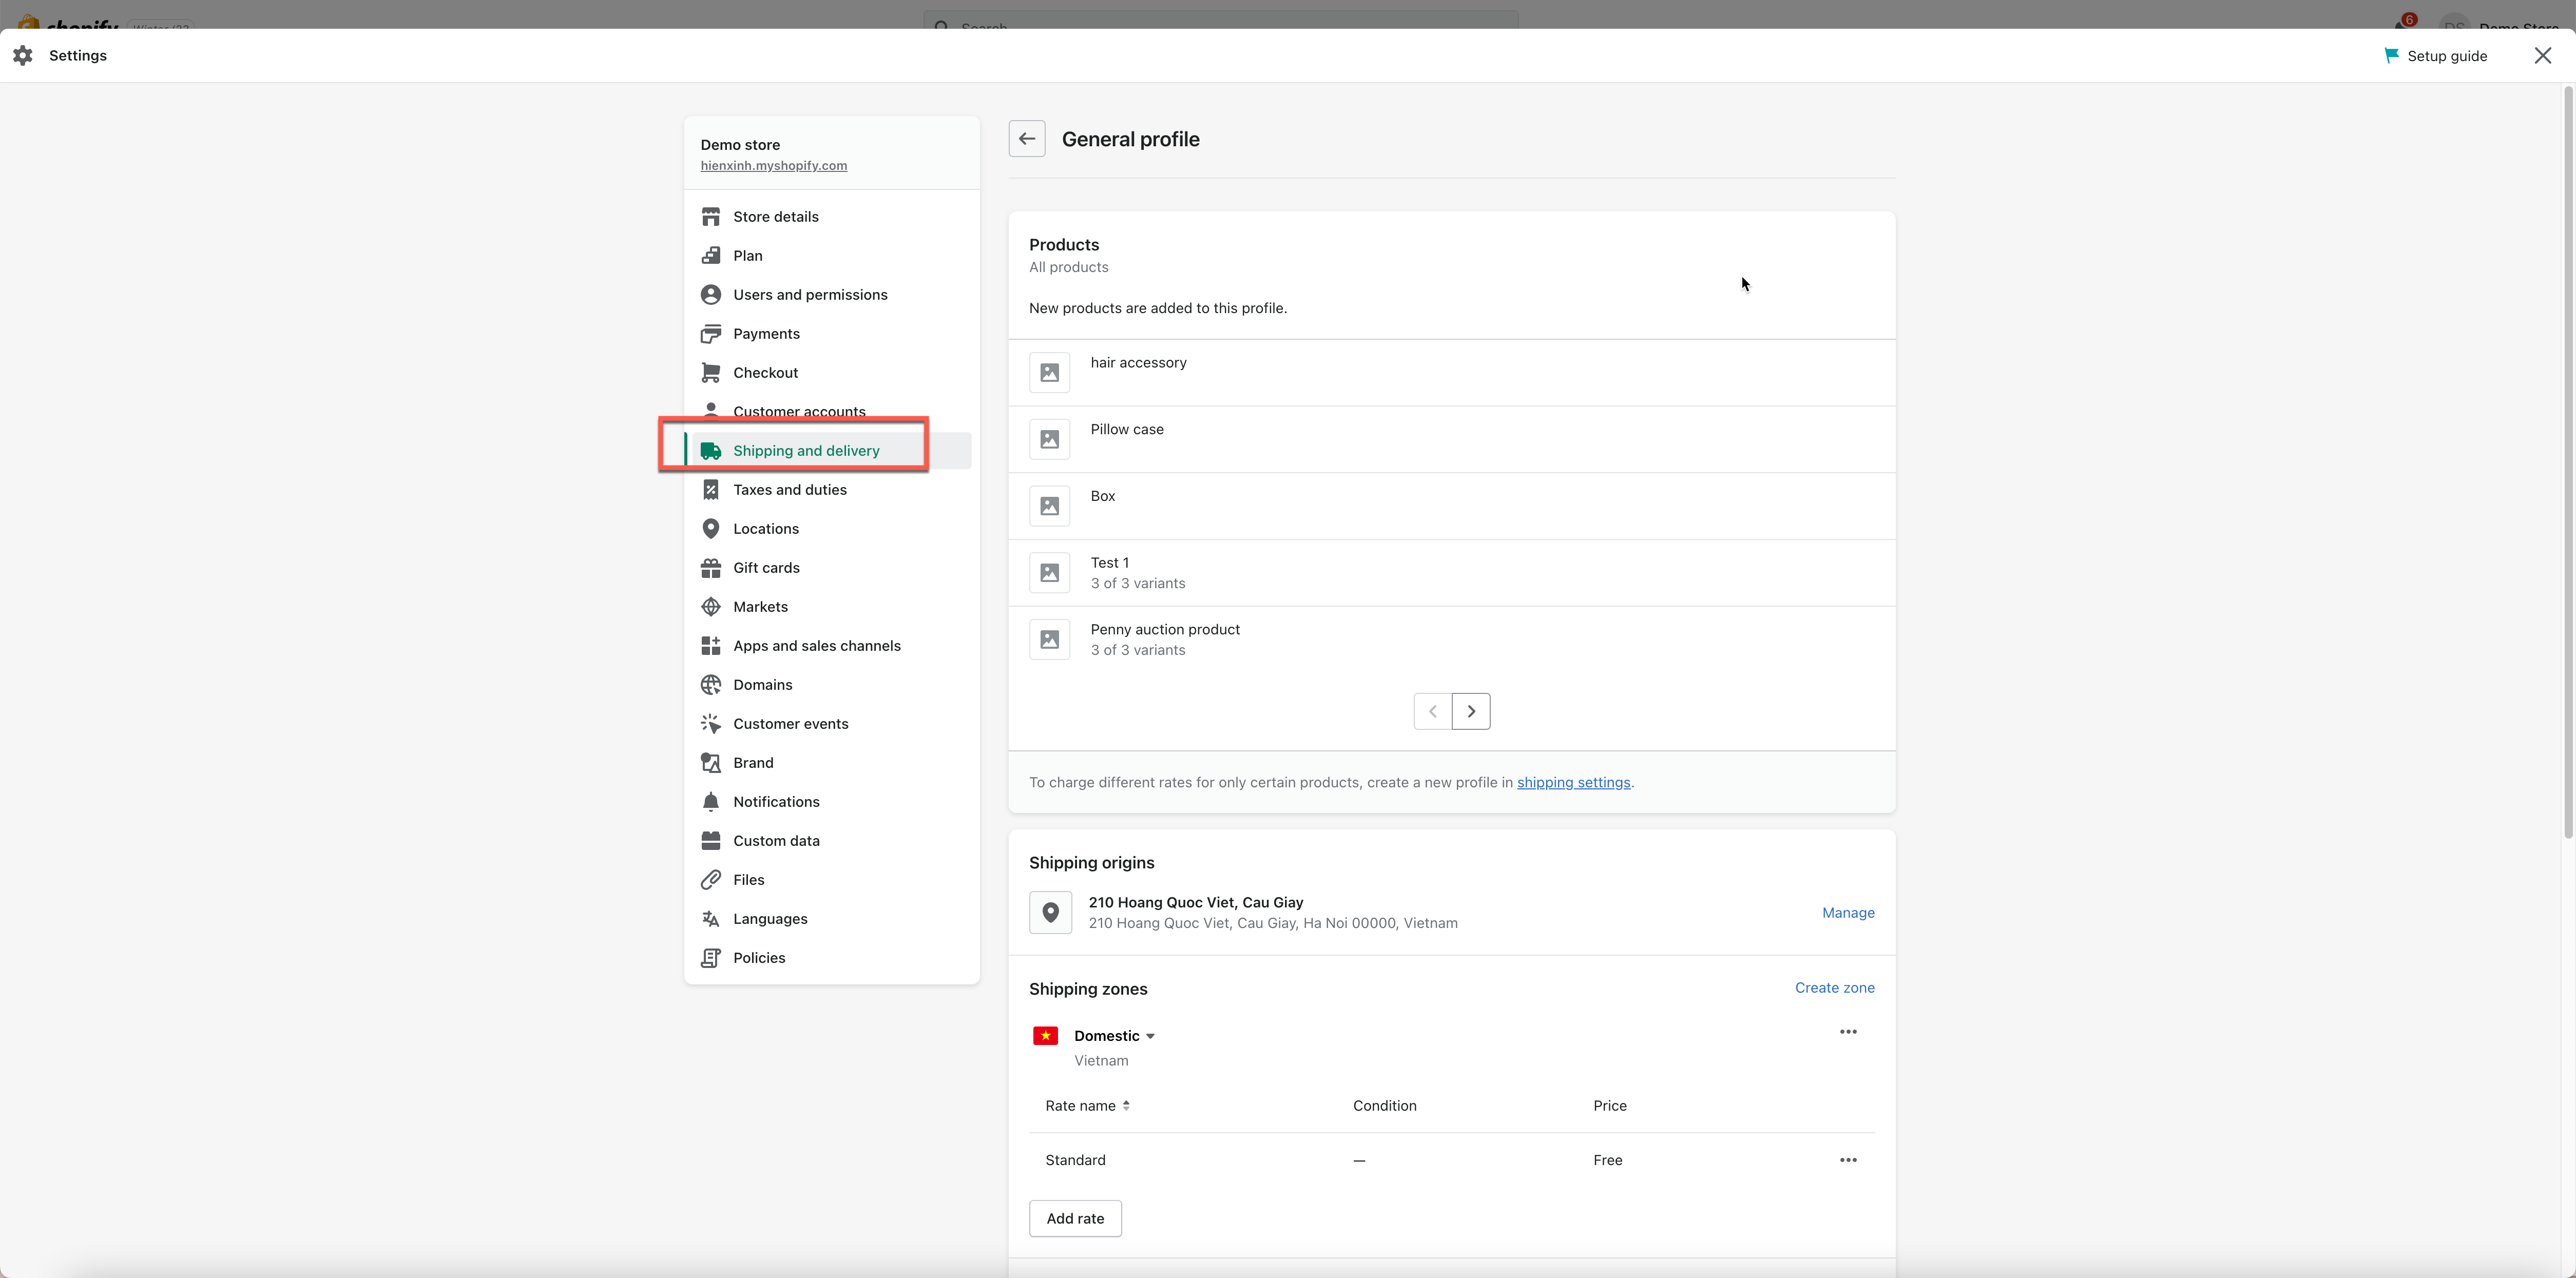
- In GENERAL SHIPPING RATES section, click Manage.
- Address any changes you need to make to your locations. For more information, refer to Managing your fulfillment locations
For each shipping zone that you want in your shipping profile, complete the following steps:
- In Shipping to, click Create shipping zone
- Name the shipping zone
- Select the countries or regions that are part of the zone, and then click Done
- For each shipping rate you want in the zone, click Add rate, choose the rate’s details, and then click Done
5. Click Save
Create a custom shipping profile
Steps to manage
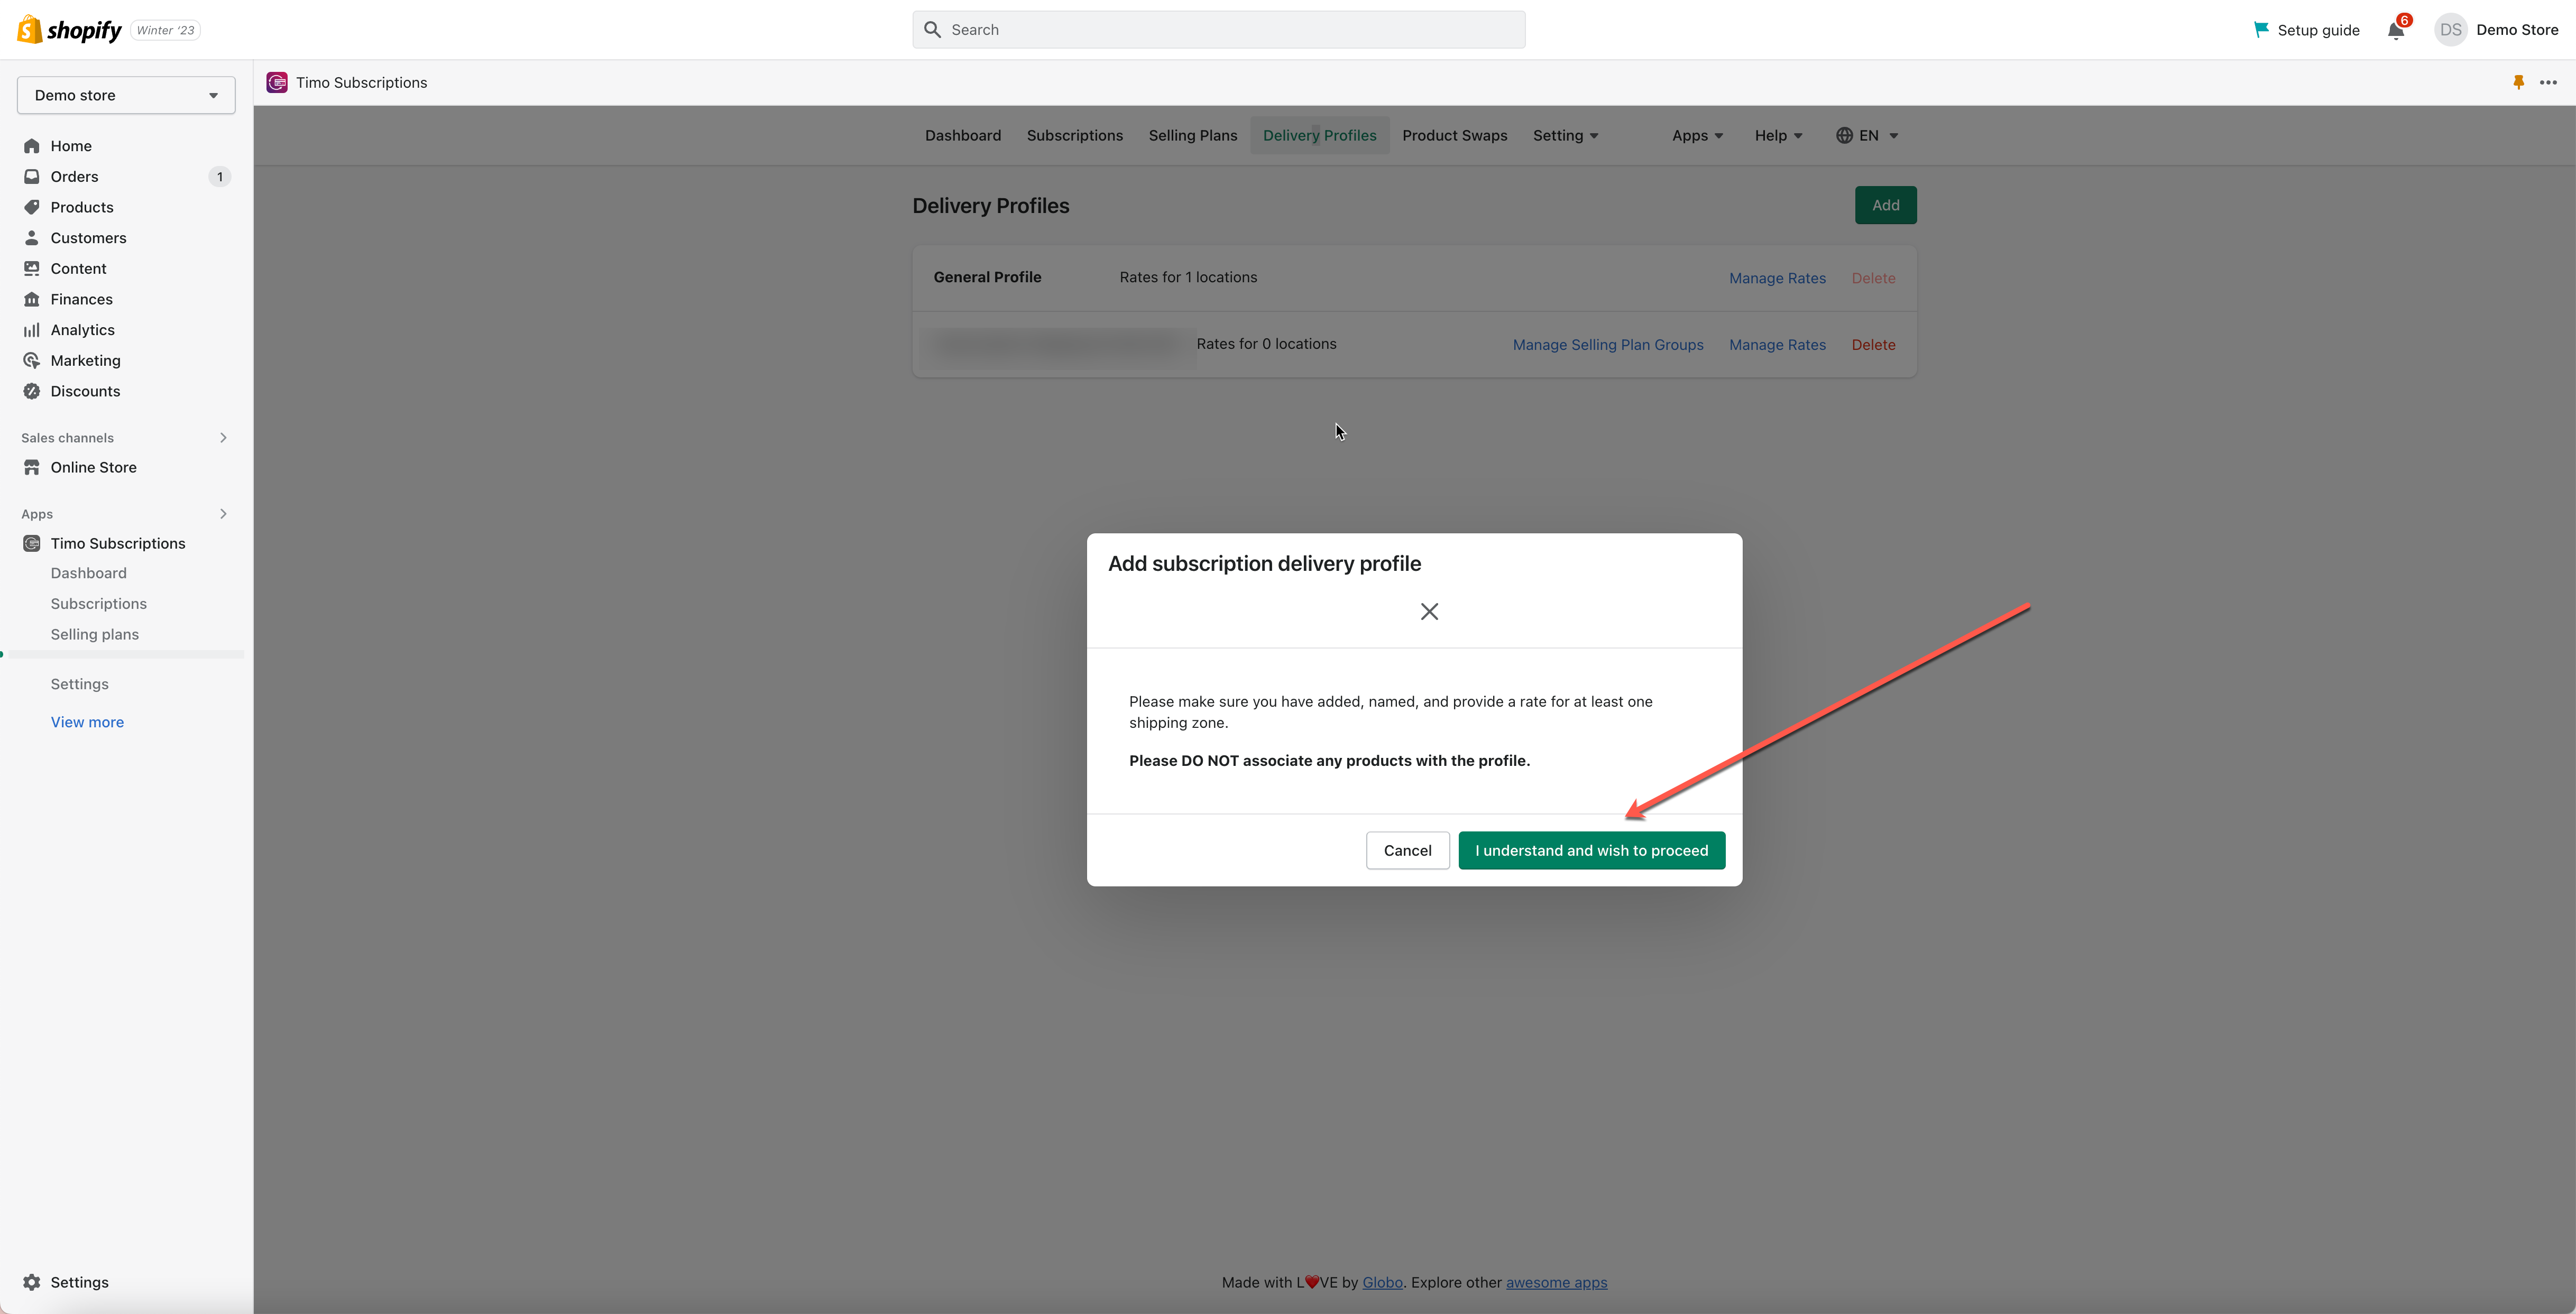
- From the app admin page, click Delivery profiles
- Click Add button > click I understand and wish to proceed on the popup to confirm your action > it directs to delivery profile in Shopify backend
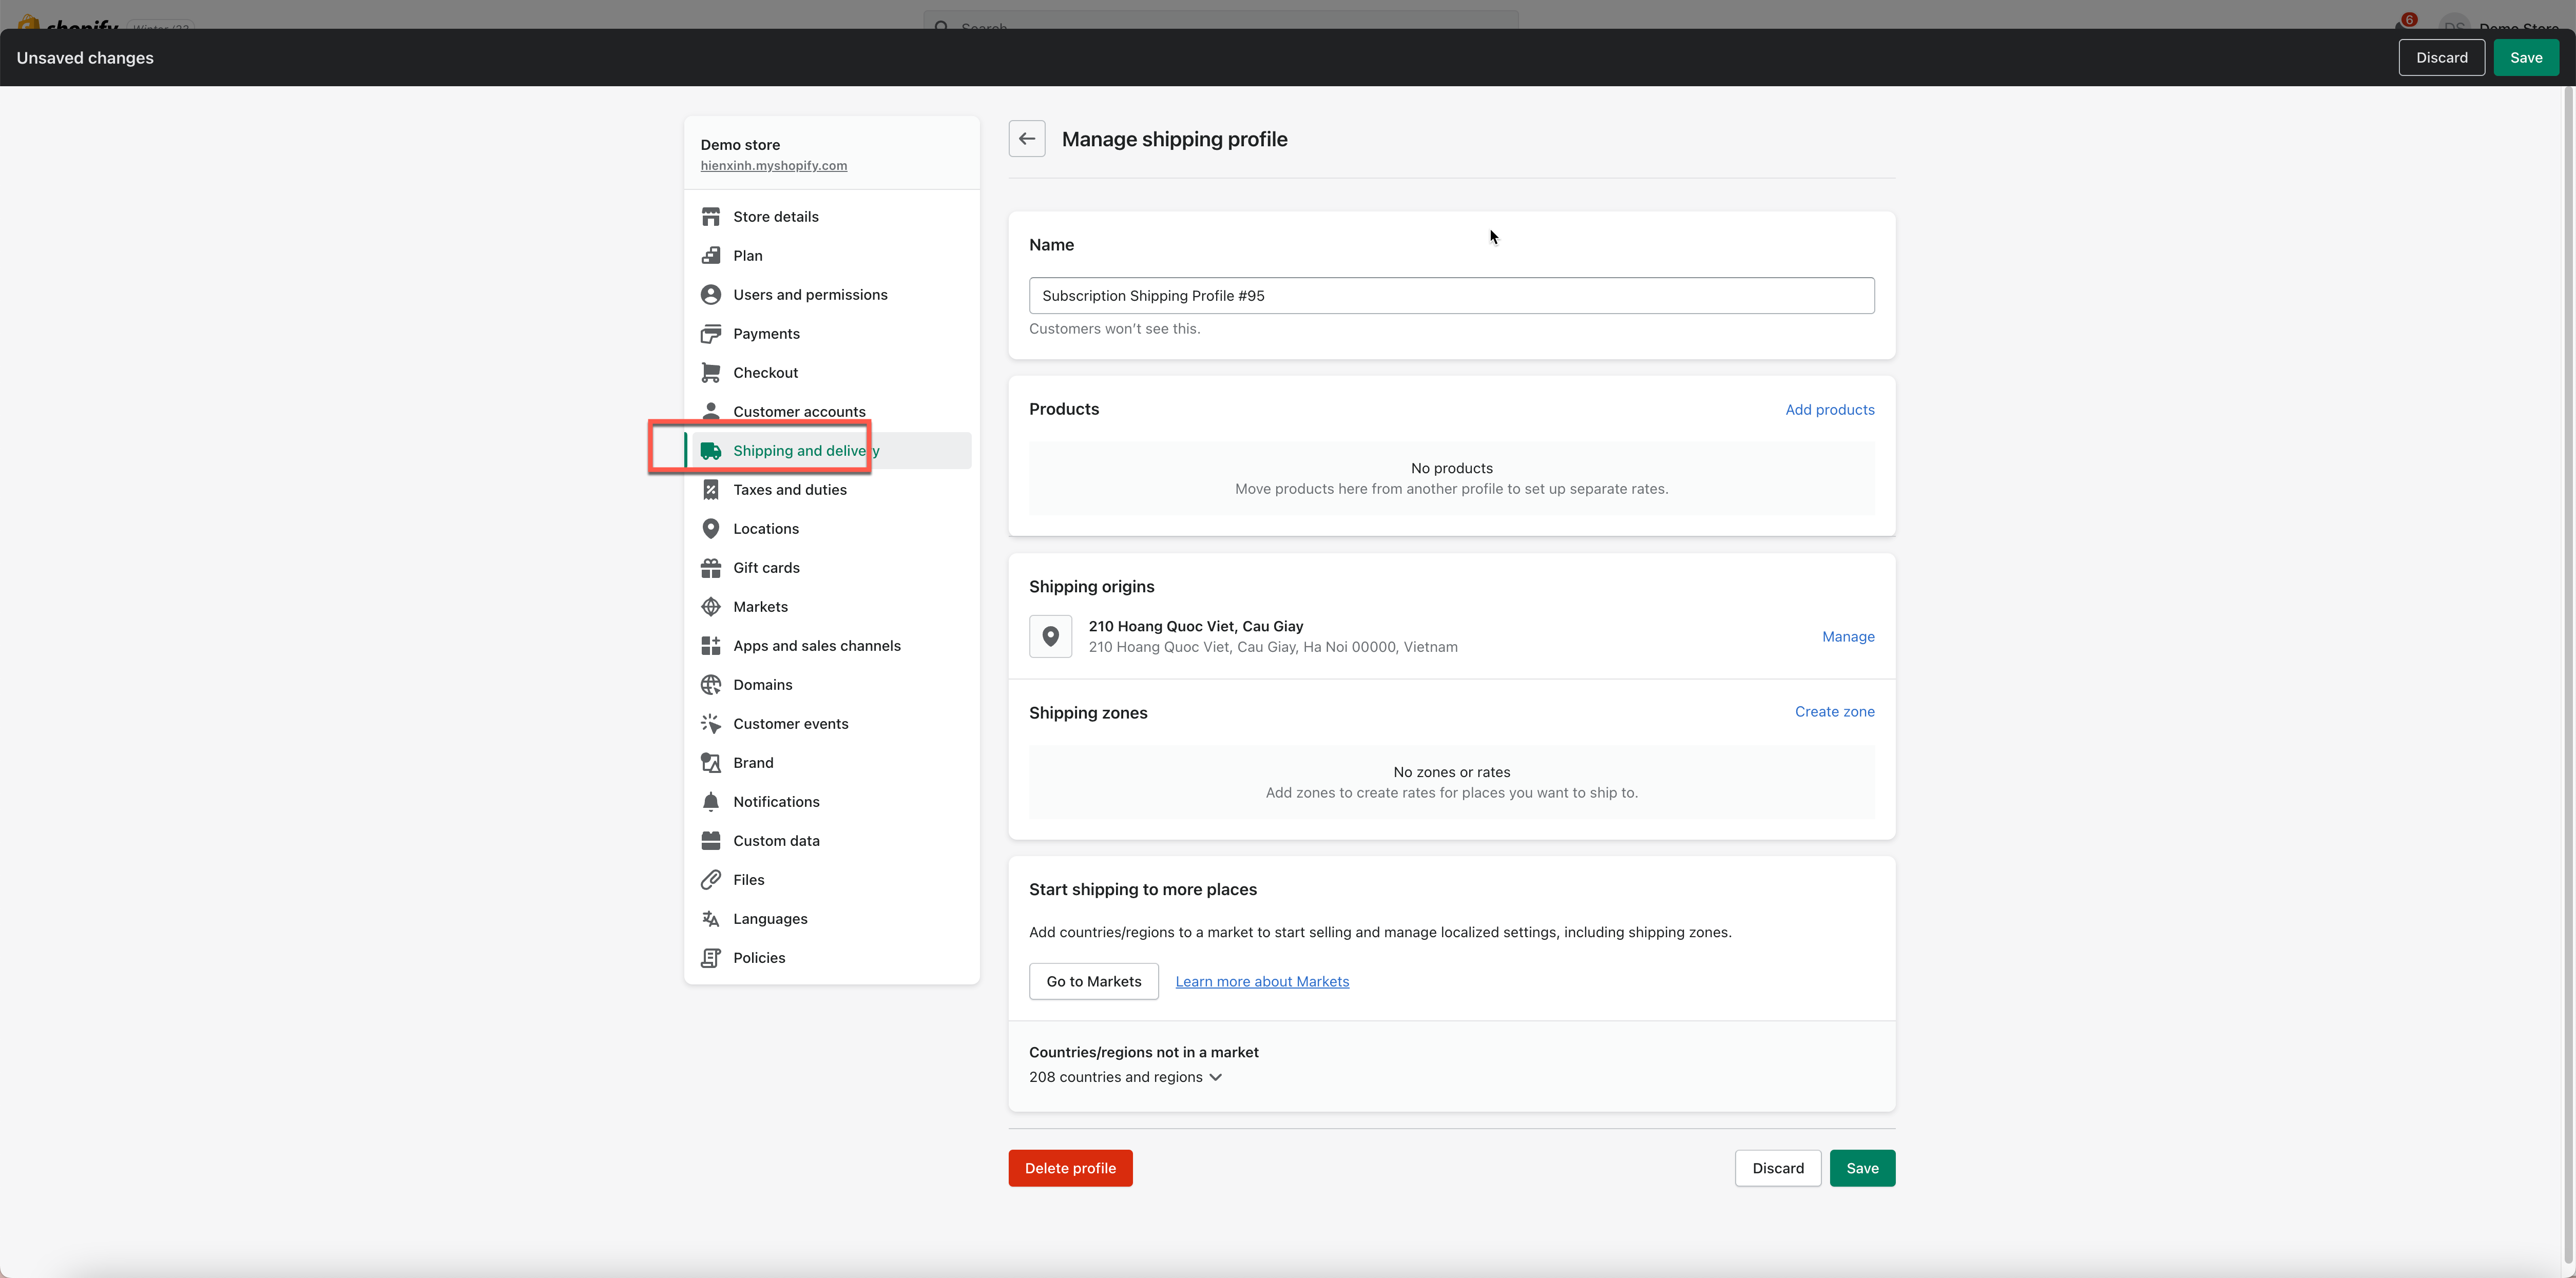
- Enter a name for the profile. For example: Subscription Shipping Profile #95
- In the Products section, use the search bar to add products to the shipping profile
- Address any changes you need to make to your locations. For more information, refer to Managing your fulfillment locations
- For each shipping zone that you want in your shipping profile, complete the following steps:
- In Shipping to, click Create shipping zone
- Name the shipping zone
- Select the countries or regions that are part of the zone, and then click Done
7. For each shipping rate you want in the zone, click Add rate, choose the rate’s details, and then click Done
8. Click Save
If you have any questions or concerns, don’t hesitate to contact us at [email protected]. We are always willing to help with all sincerity.