


To set up pre-order for single product, please follow all of these guidlines and instrutions below for more details
- From the admin site of the app, click ” Single products” tab
- Click ” Add products“
- Search and select a particular product that you want to add pre-order
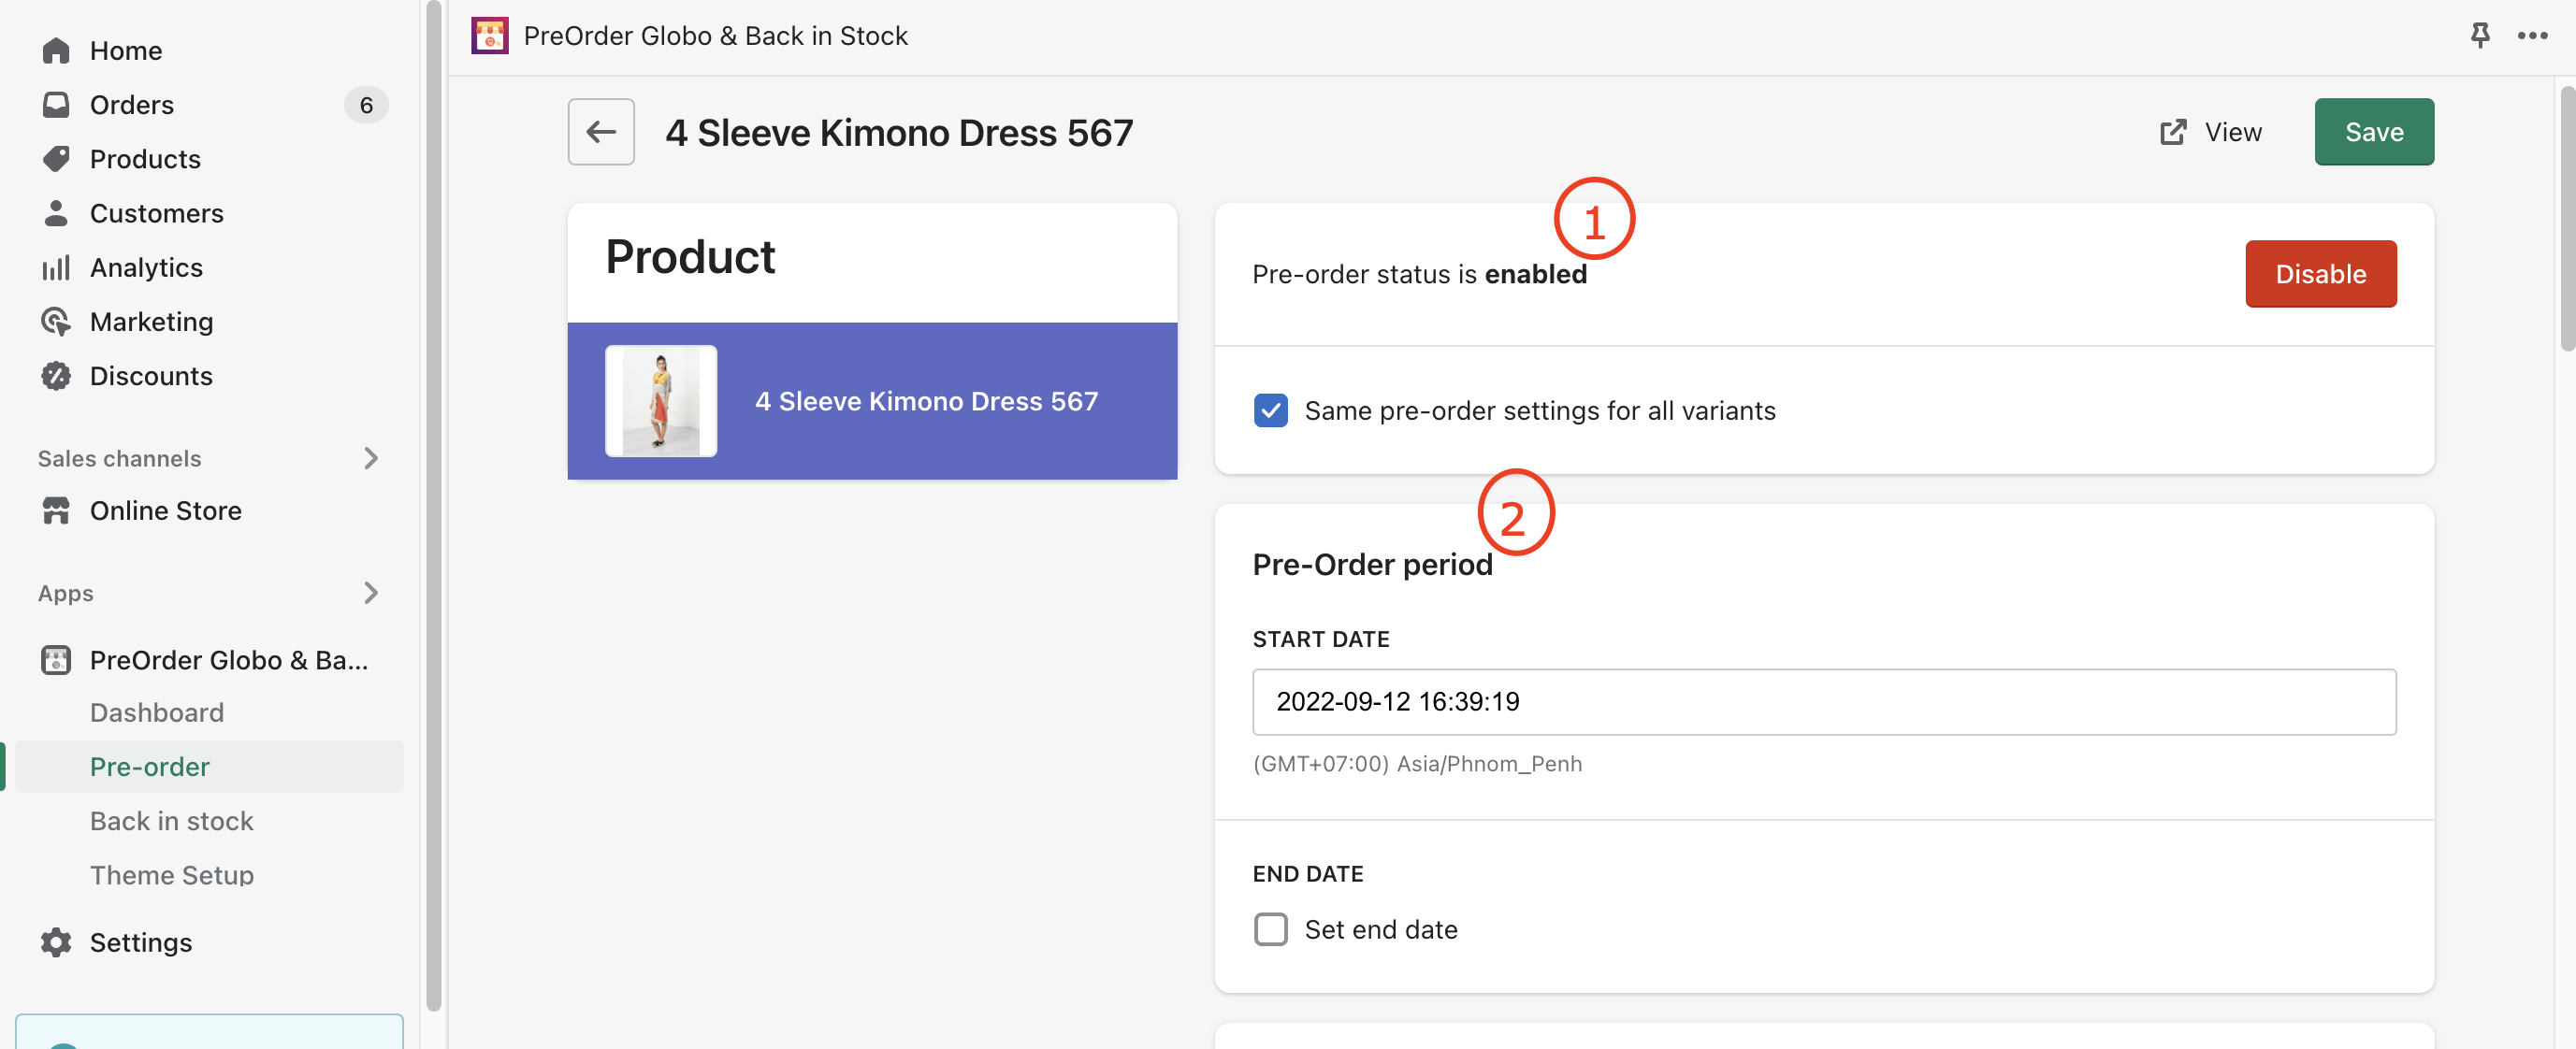
Note: In case this product contains variants and you want to set up pre-order for all of variants, please enable the checkbox ” Same pre-order settings for all variants“.
Or else, if you want to configure for each variant, please disable the check box and click to each variant to add pre-order option
Here are all of necessary steps that required to start a pre-order session:
1. Enable Pre-order status
2. Set up Pre-Order period
* START DATE (required): Start pre-order session when set-up date arrives (by default, the app takes the current time you start setting up)
* END DATE (optional): Finish pre-order session when the set-up date arrives
3. Setting “CONDITION TO START/FINISH PRE-ORDER”
* Pre-Order regardless of stock levels: Start preorder session as soon as the START DATE condition is satisfied even when this product is still available
* Pre-Order only when Out of Stock: Only start pre-order session when the quantity of product is less than 0
* Pre-Order only when Shopify inventory is available: Only start pre-order session when the quantity of product is more than 0
Note: End pre-order stock: this checkbox will be accompanied by each of 3 above settings
* Unlimited stock: the app will check the End Date condition first, if you don’t enable End Date, Pre-order will finish only when you disable it or delete Single product setting
* Limited stock: Finish pre-order session when the quantity of this product is equal to set-up quantity and Pre-order will end when any of these end conditions (End Date, Limited Stock) ends first

4. Enable ” Overselling setting“
To show up Pre-order when the quantity of this product is equal to 0, you need to enable the checkbox “Continue selling when out of stock” in Inventory settings
* Enable Turn ON “Continue selling when out of stock” for all “Track quantity” products => The app will check this condition for any variants which are activated ” Track quantity”
* Enable “Keep products’ inventory setup, I will enable by myself” => This function will not make any changes to Inventory settings of the app; till then you need to check each pre-order products manually

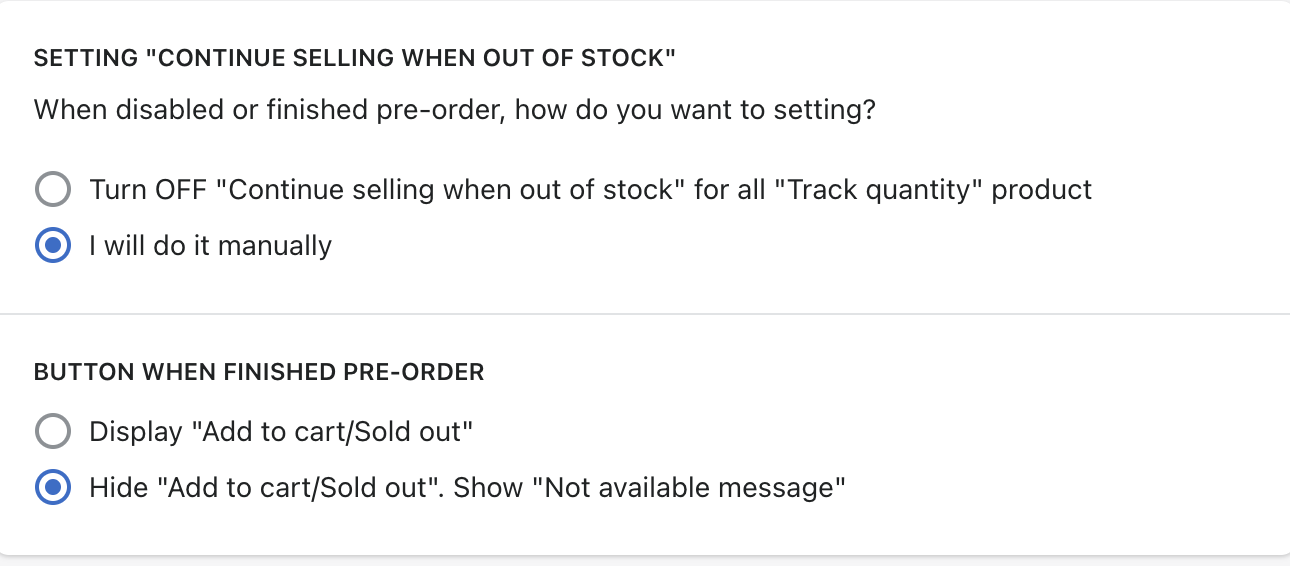
5. Setting “CONTINUE SELLING WHEN OUT OF STOCK”
When the preorder ends/is disabled, you can manage the status of the checkbox “Continue selling when out of stock” in Inventory settings right from the app side
* Enable Turn OFF “Continue selling when out of stock” for all “Track quantity” product => The app will check this condition for any variants which are activated ” Track quantity”
* Enable “I will do it manually” => This function will not make any changes to Inventory settings of the app; till then you need to check each pre-order products manually
6. Setting “BUTTON WHEN FINISHED PRE-ORDER”
* Display “Add to cart/Sold out”: the default button of the them will be shown out
* Hide “Add to cart/Sold out”. Show “Not available message”: the app will show its default button “Unavailable” you set up on the Translation tab/ Custom message
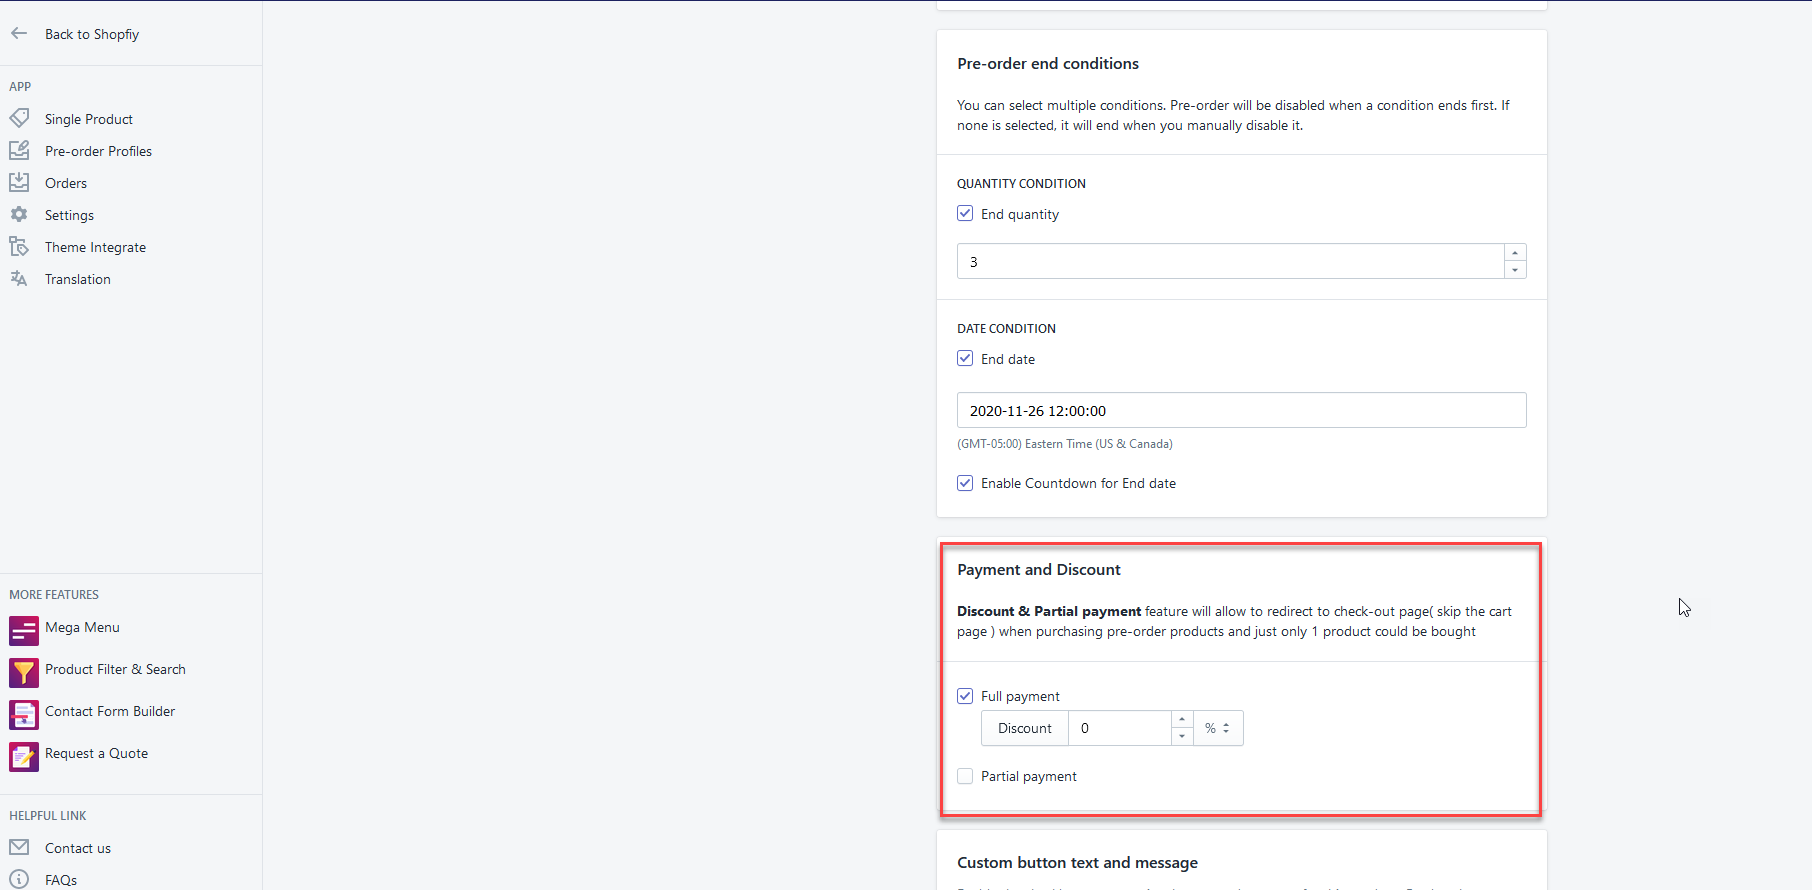
7. Select payment and discount
When you create a new pre-order product, the app will automatically select “ Full-payment” with a discount equal to 0%. However, this option will not be displayed in the front-end store
* Full payment
– Discount: Add the discount value for pre-order products with 2 forms of % and $
* Partial payment: Allow customers to have a partial payment in advance. There will be an email notification to inform them to fulfill the payment
– Prepaid: Prepaid value needs to be greater than 0 in the form of $ or %
– Discount: Add the discount value for prepaid products in the form of % or $
8. Custom button text and message:
*Enable the checkbox to customize the text and message for single product. Or else, the app system will use default configuration in ” Translation”
*Set up and edit button text, message above/under pre-order button, and NA (not available) message
9. Click “save” to update the change
If the status of pre-order product is disabled and in the “ Overselling settings” and you select the condition as “Turn on “Continue selling when out of stock” for all “Track quantity” products”, there will be a pop-up window to notify you to re-check the inventory of products
If you do encounter any difficulty while proceeding these steps, don’t show any hesitation to contact us promptly via the email address
We are always willing to help with all sincerity