


The integration between our app and POS helps you simplify your business by accepting payments both online and offsite. With our easy-to-use POS custom feature, you can accept cash, credit/debit cards as well as gift cards.
Shopify POS is a user-friendly iPad app that lets merchants make sales in store. You can run it on its own, or sync it with an online Shopify store to track all your client’s online, mobile, and in-store orders in one place.
Note: The POS integration feature is only available in the version 2 of our app. If you are using version 1, please contact us at [email protected]. We are always happy to support you!
G:Variants & Product Options app in POS app
Steps to manage
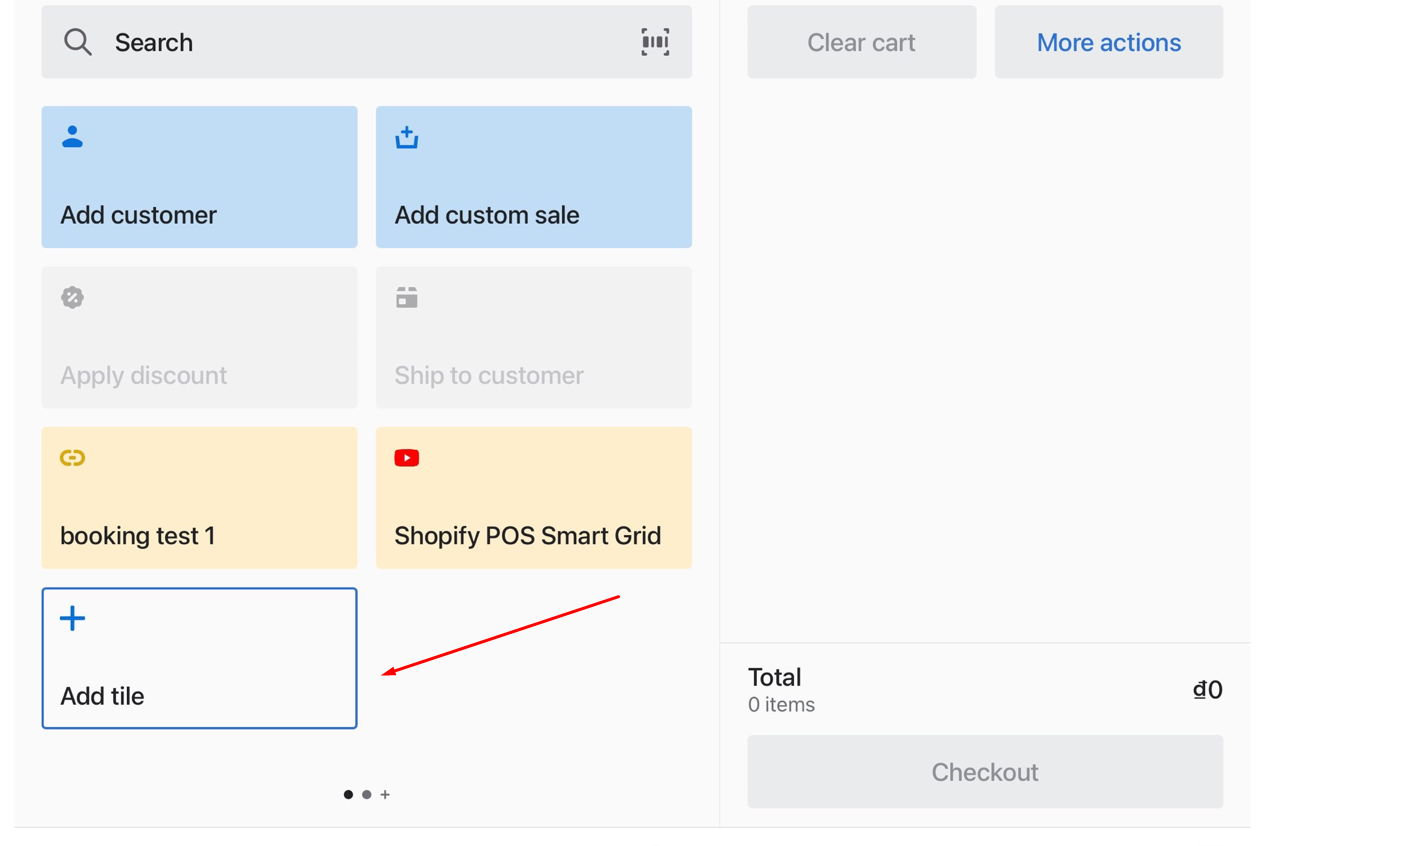
1. On the smart grid, tab Add tile.
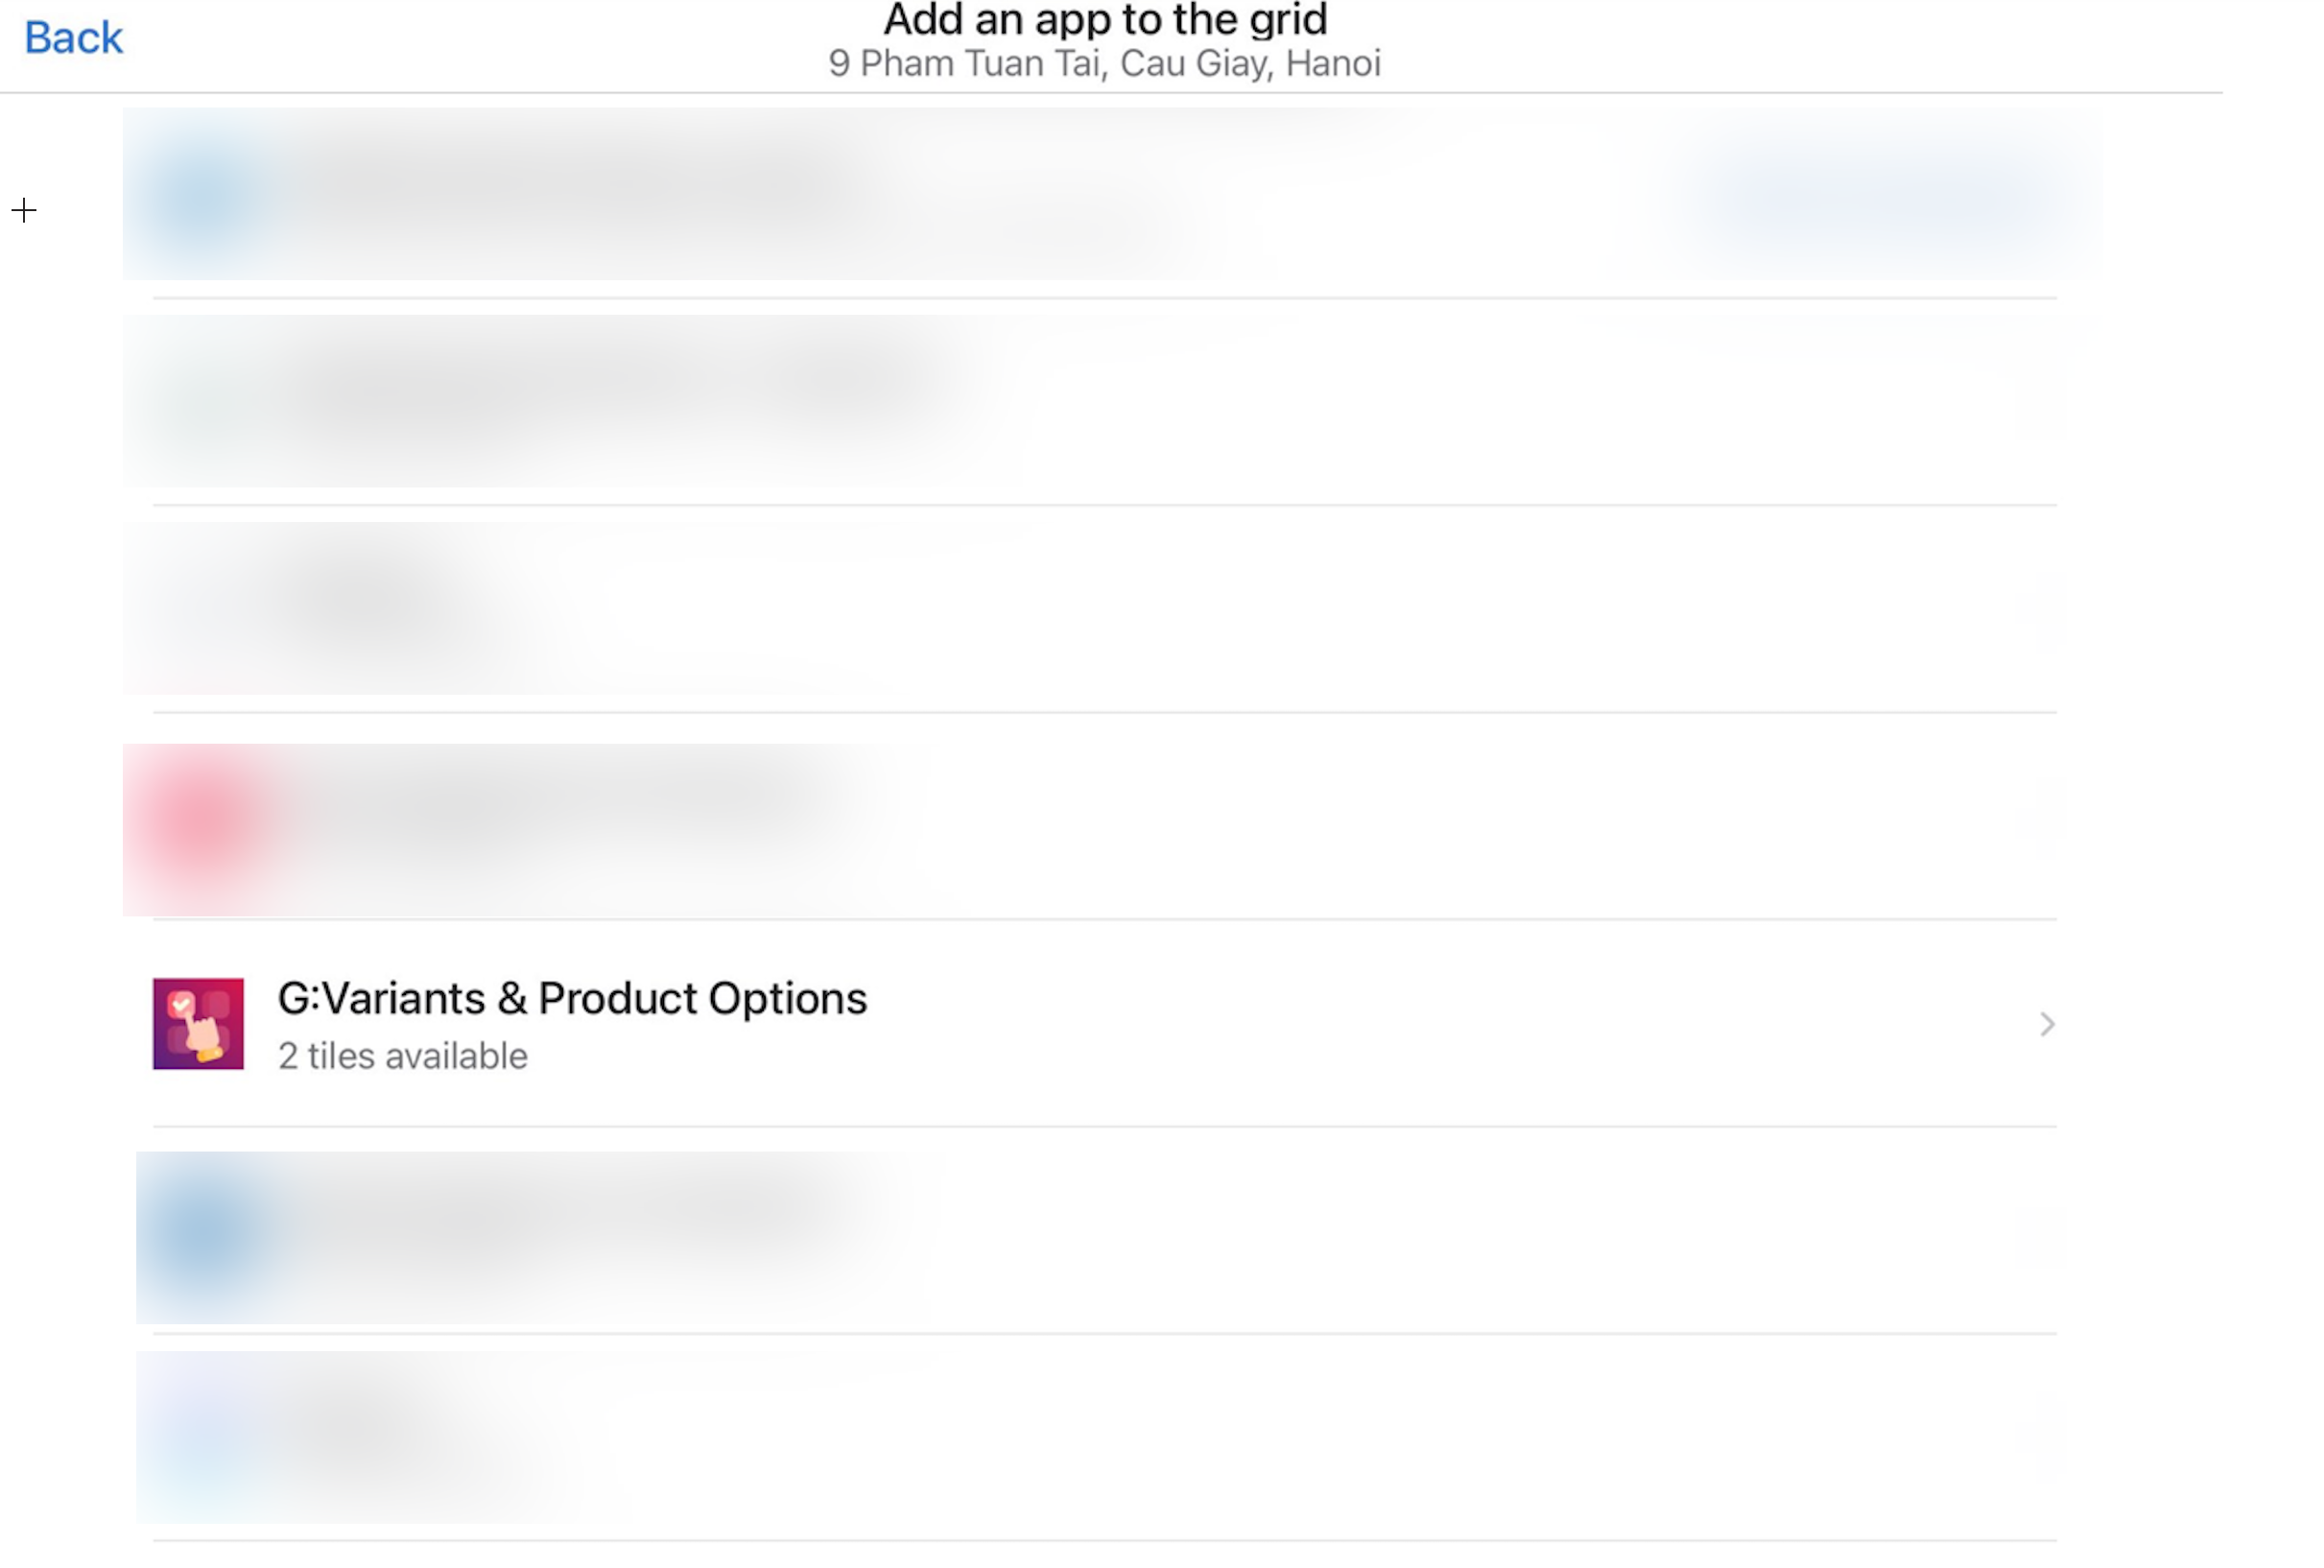
2. Then tap App. Form here, you’ll see the POS apps you’ve already added in your Shopify admin.

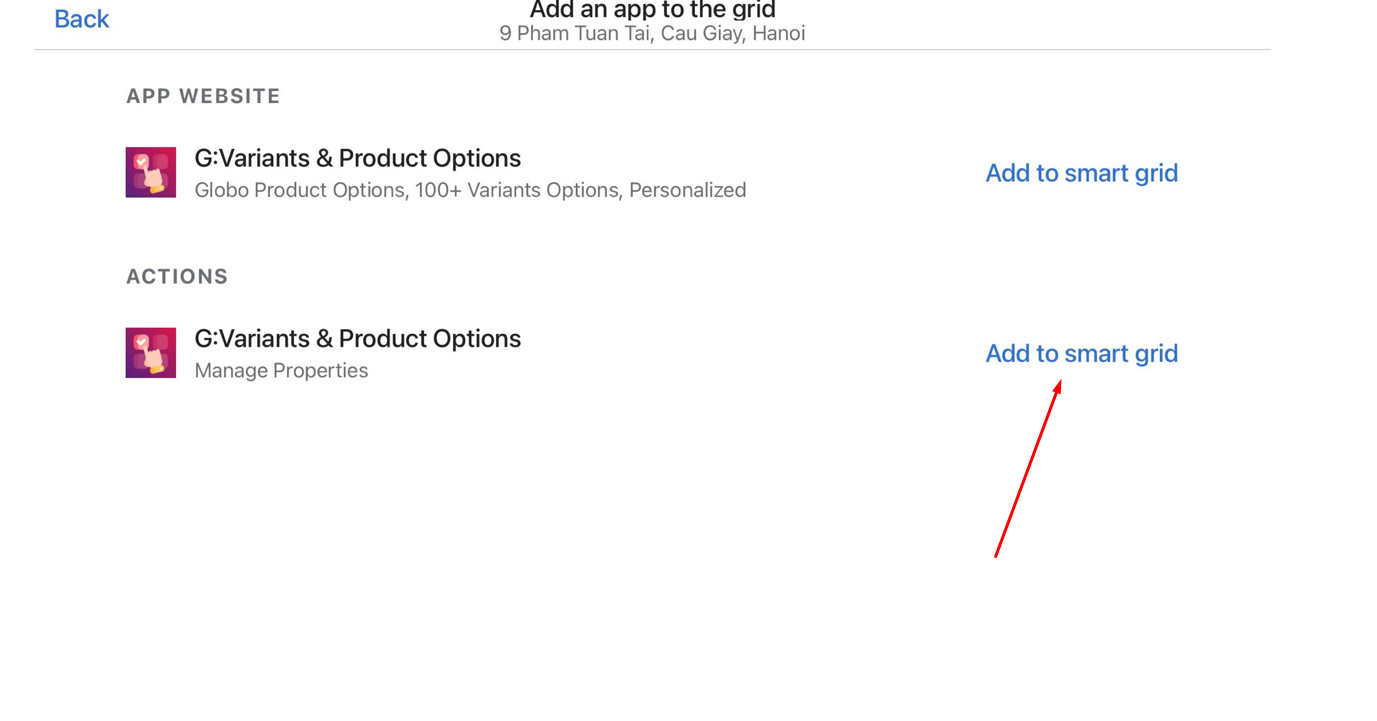
3. There are 2 tiles of G:Variants & Product Options: one for mange properties, one for managing Shopify store.
Tap Add to smart grid on G:Variants & Product Options-Mange properties to save the app on the smart grid.
4. Tap Done
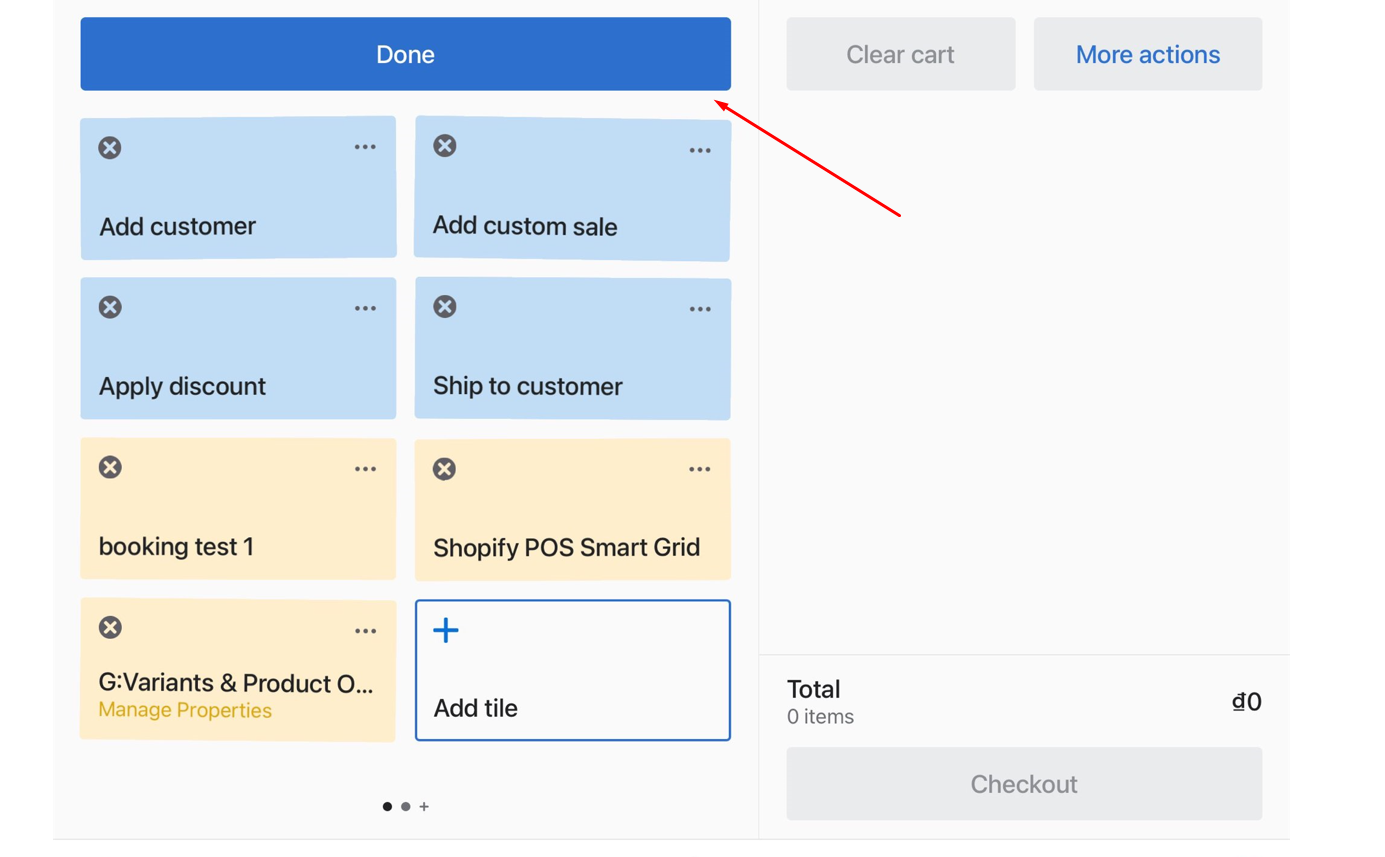
Now G:Variants & Product Options app is added to the POS smart grid to use for sale.
Adding product to the cart to sell
Adding product to the cart is one of the primary function of any point of sale systems.
Steps to manage
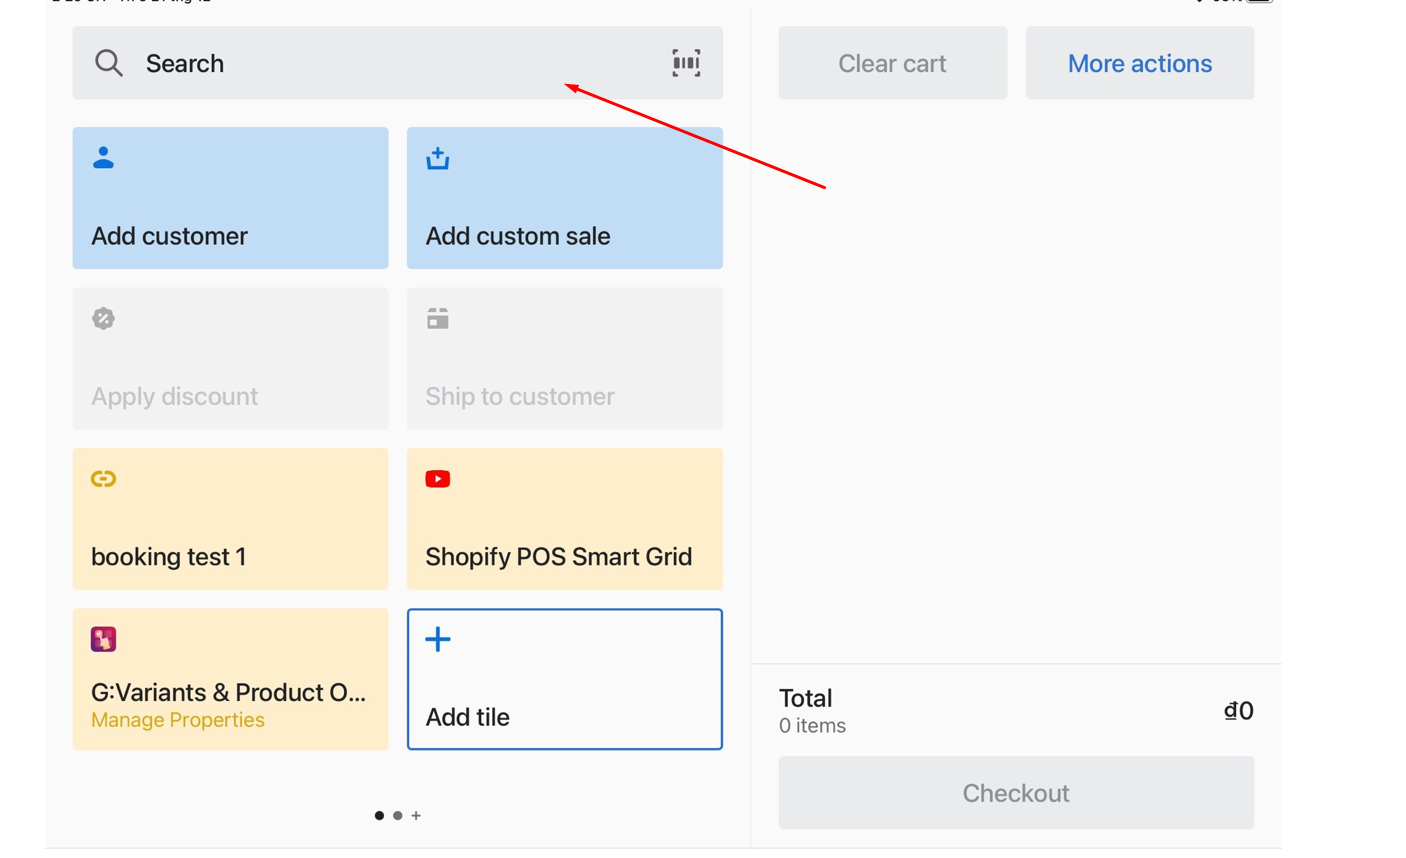
1. The basic way to access the products is to use the global search bar on the top of the Home screen
2. Type your search term whether it’s product, variant, vendor name or any relevant identifying information. And you’ll see a list of products that match your search.
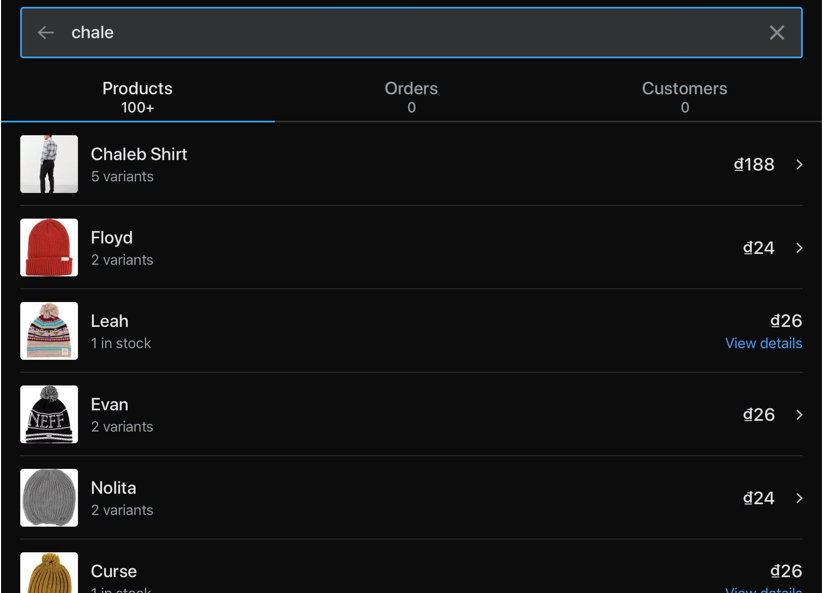
3. If the product has multiple variants, then select a variant that’s in stock at the location. From here, add the products to the cart
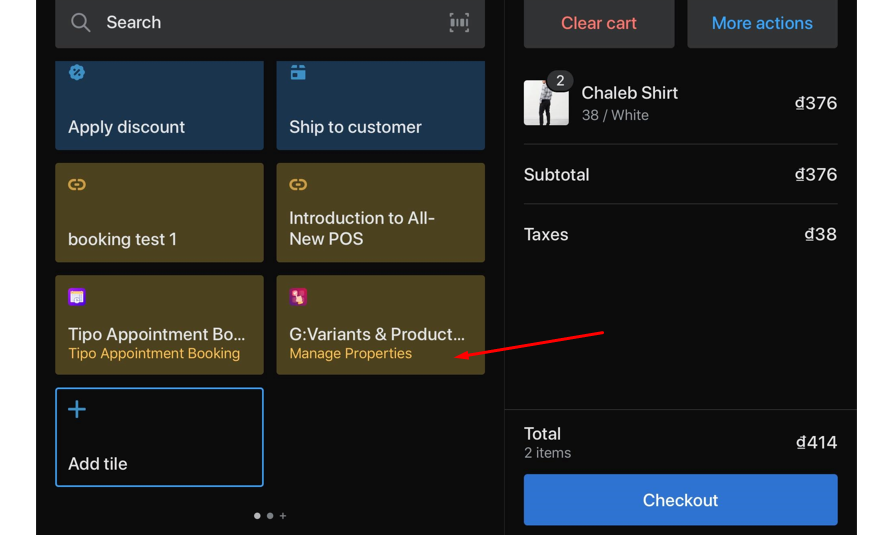
4. Then go to G:Variants & Product Options – Mange properties in the Home screen
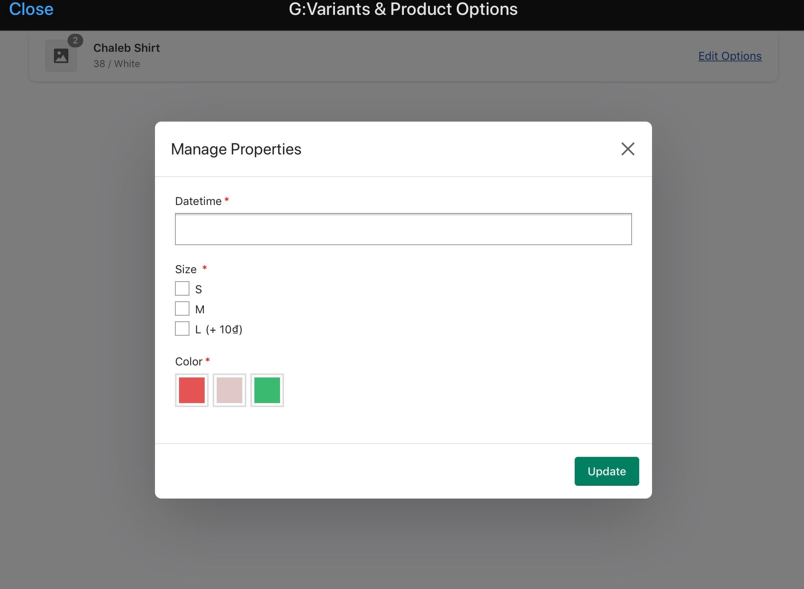
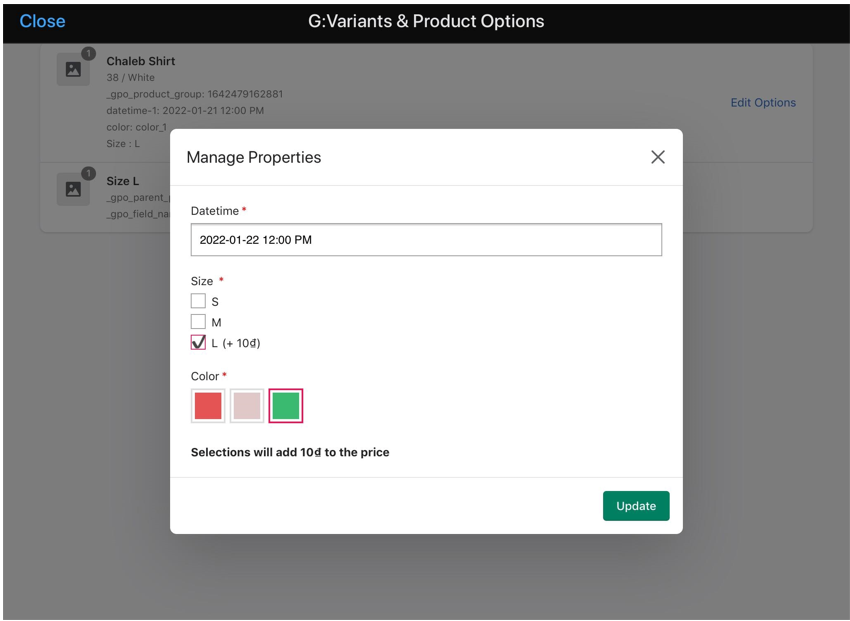
5. In this tile, tap Edit options and add the product options created by the app to the cart
You will see products option in the cart that matched an option set. Enter values for all fields necessary for this transaction, then tap the Close link in the top left to go back to the home screen.
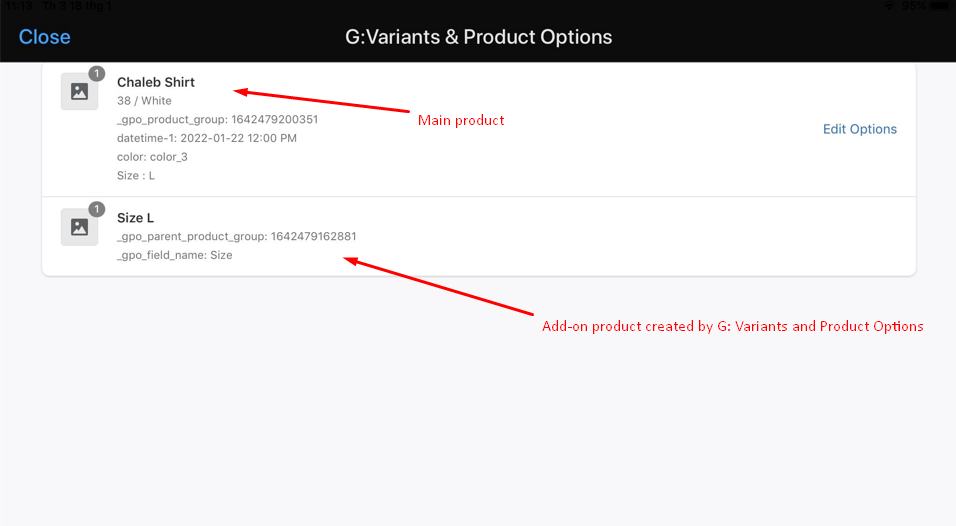
In case customer choose the add-on option of product (option which add extra price to product price), the add-on product will be added to the cart as you see below:
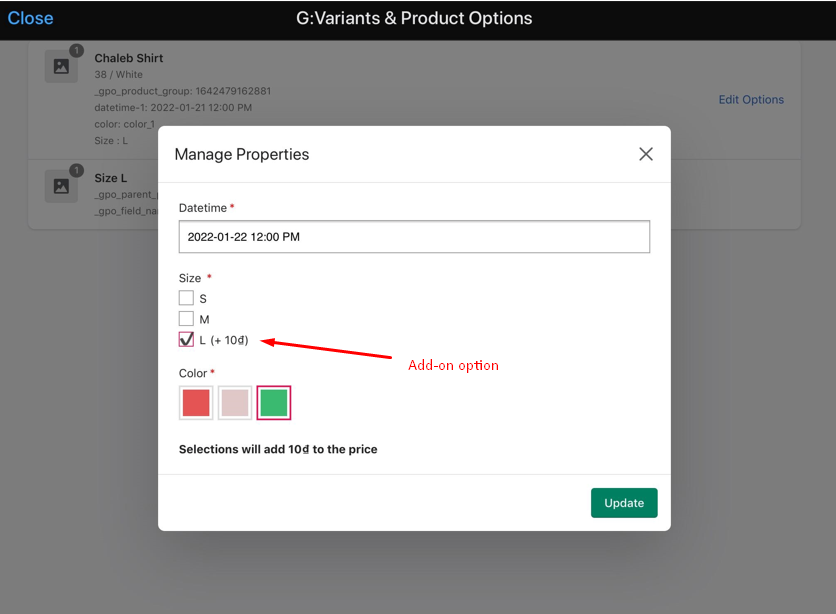
Learn more about the Add-on product here: Manage add-on product | Globo Apps – Shopify Apps (globosoftware.net)
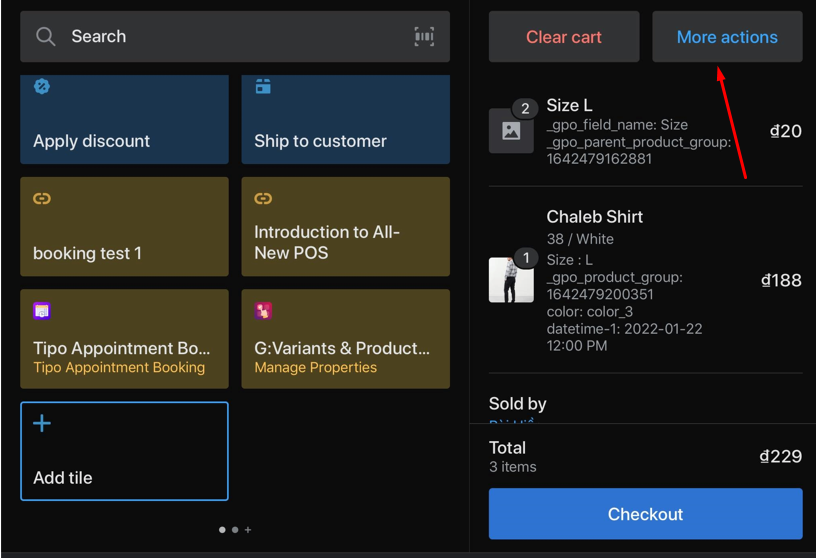
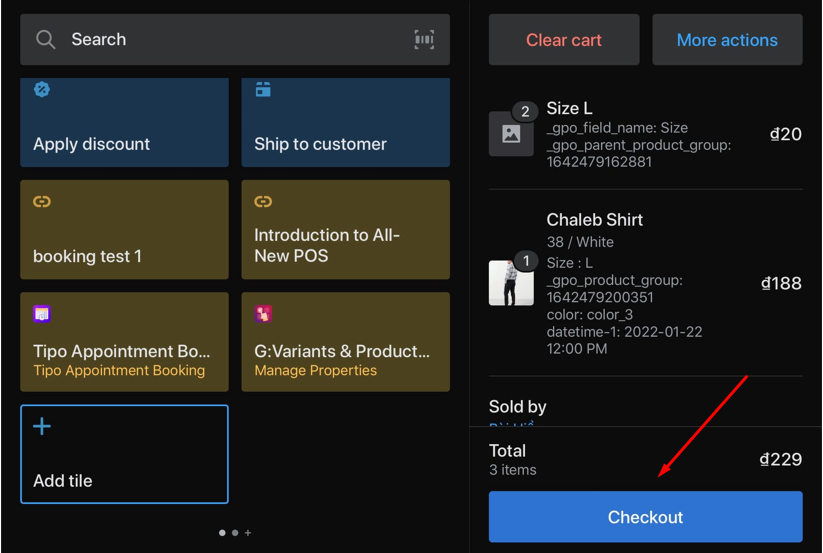
6. On the Homescreen, tap More actions and process the steps you want like Add customers, Add discount, …

5. Verify that all of your Line Item Properties look good on the cart summary screen and tap the Checkout button. You’re now presented with all the payment types that you previously enabled in Shopify POS
If you do encounter any difficulty while proceeding these steps, don’t show any hesitation to contact us promptly via the email address [email protected]