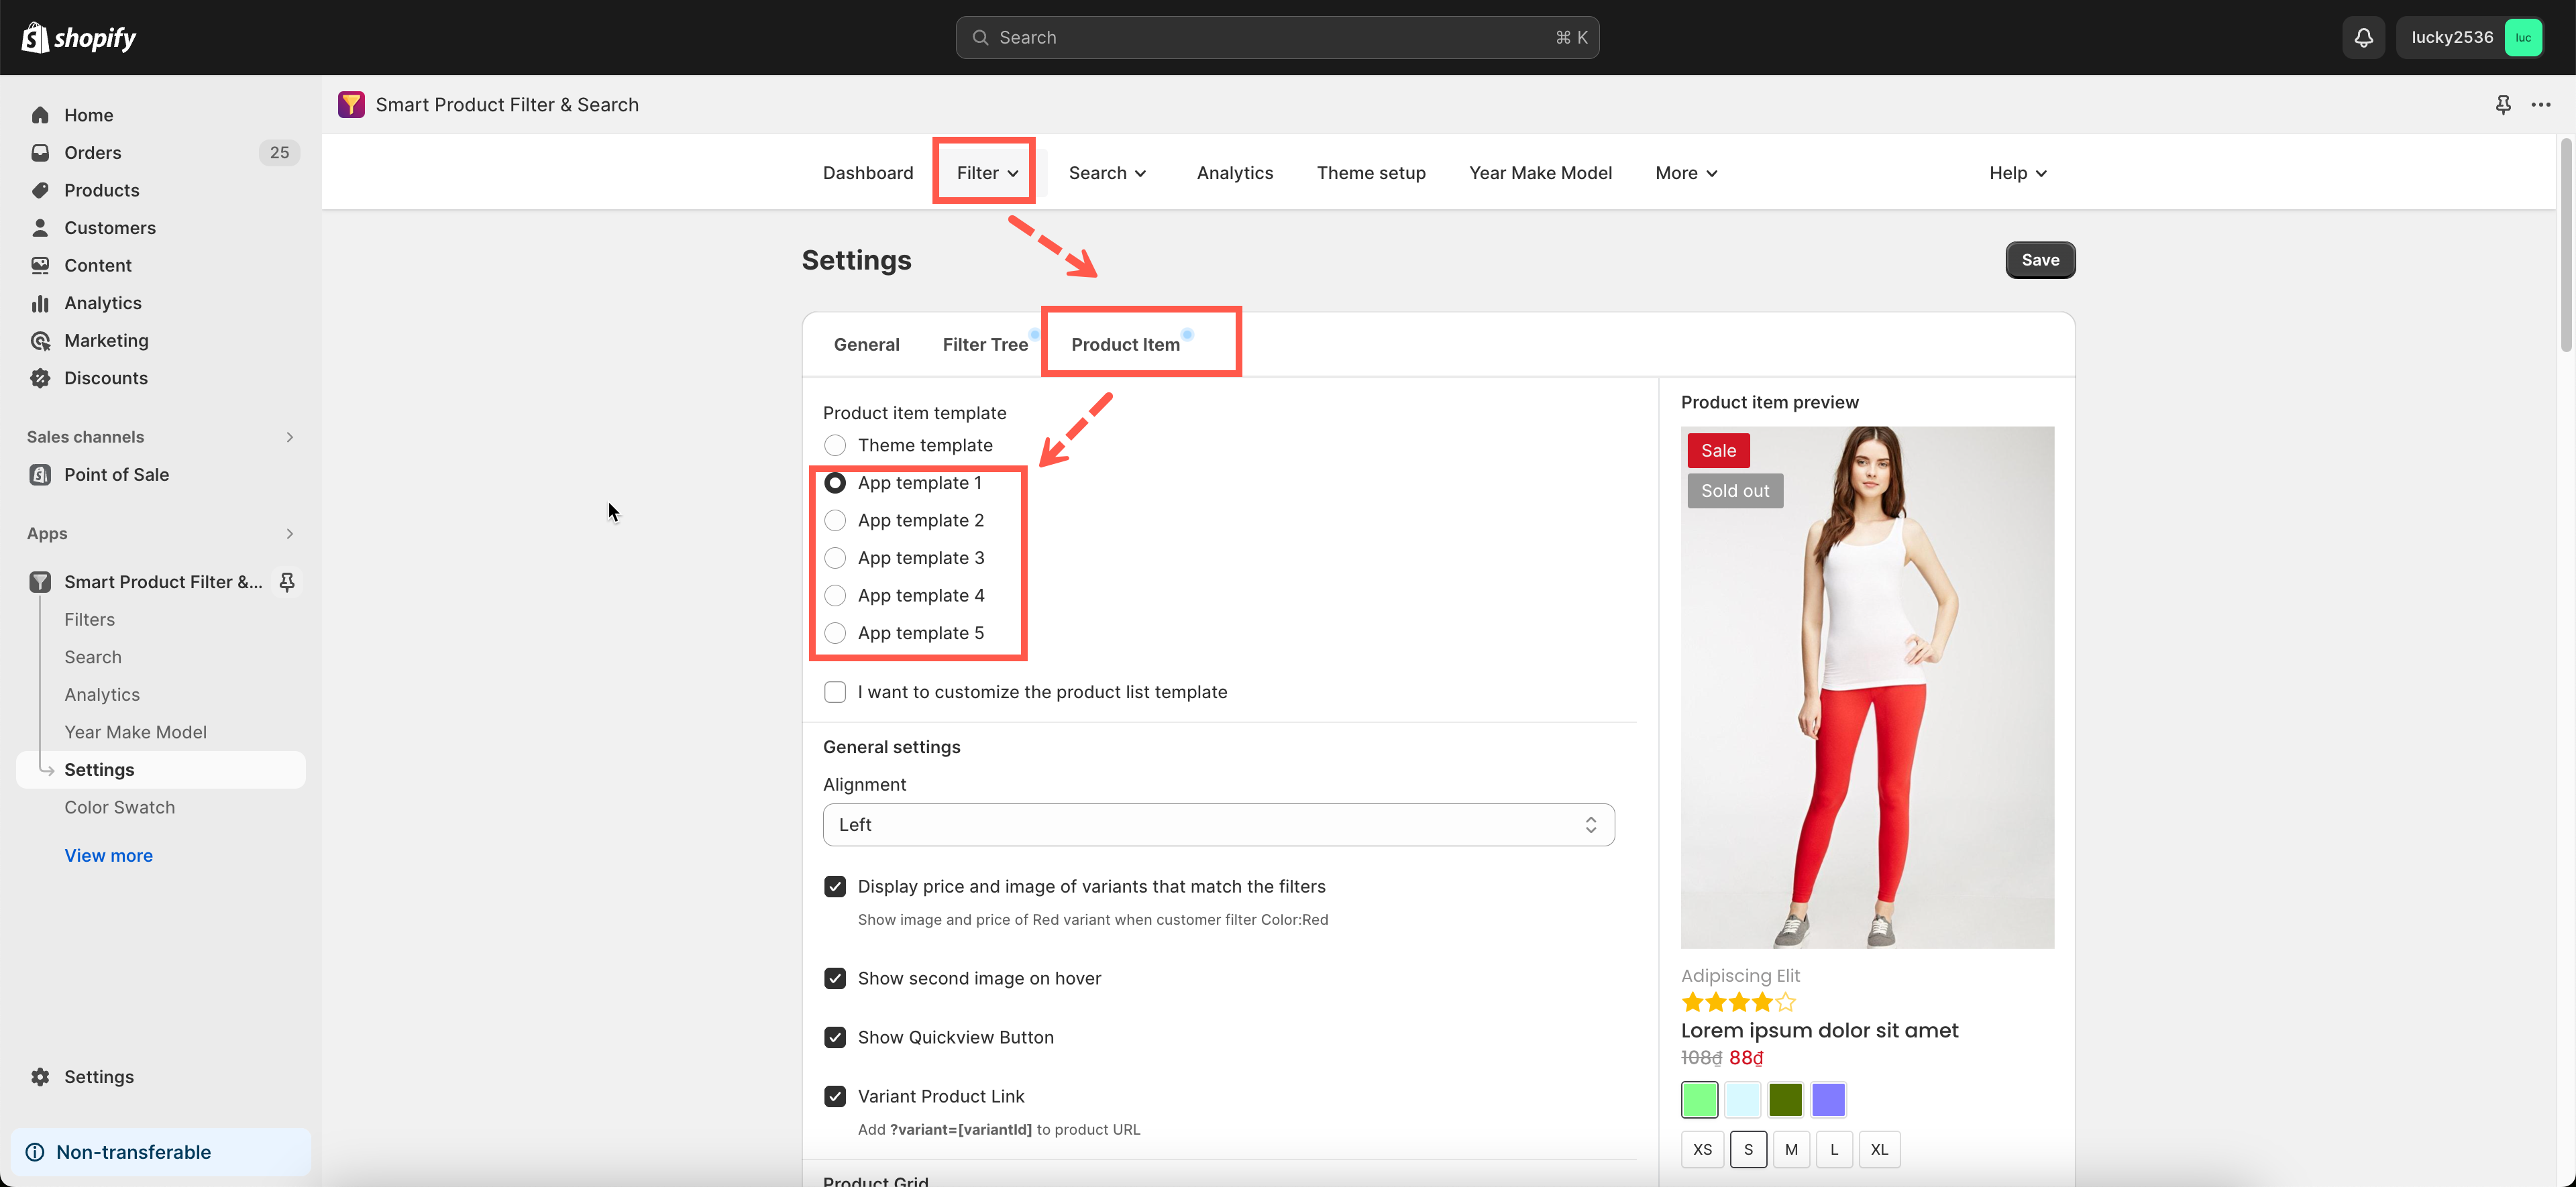
Enabling app product list layout
You have to use the app’s collection page layout if your theme is not supported. You follow these below steps to enable the app product list layout option.
Steps
- From the app’s dashboard, click Product Layout.
- In the Product List Layout dropdown, select the App layout option.
- Set up the layout configurations (details below).
- Click Save to finish.
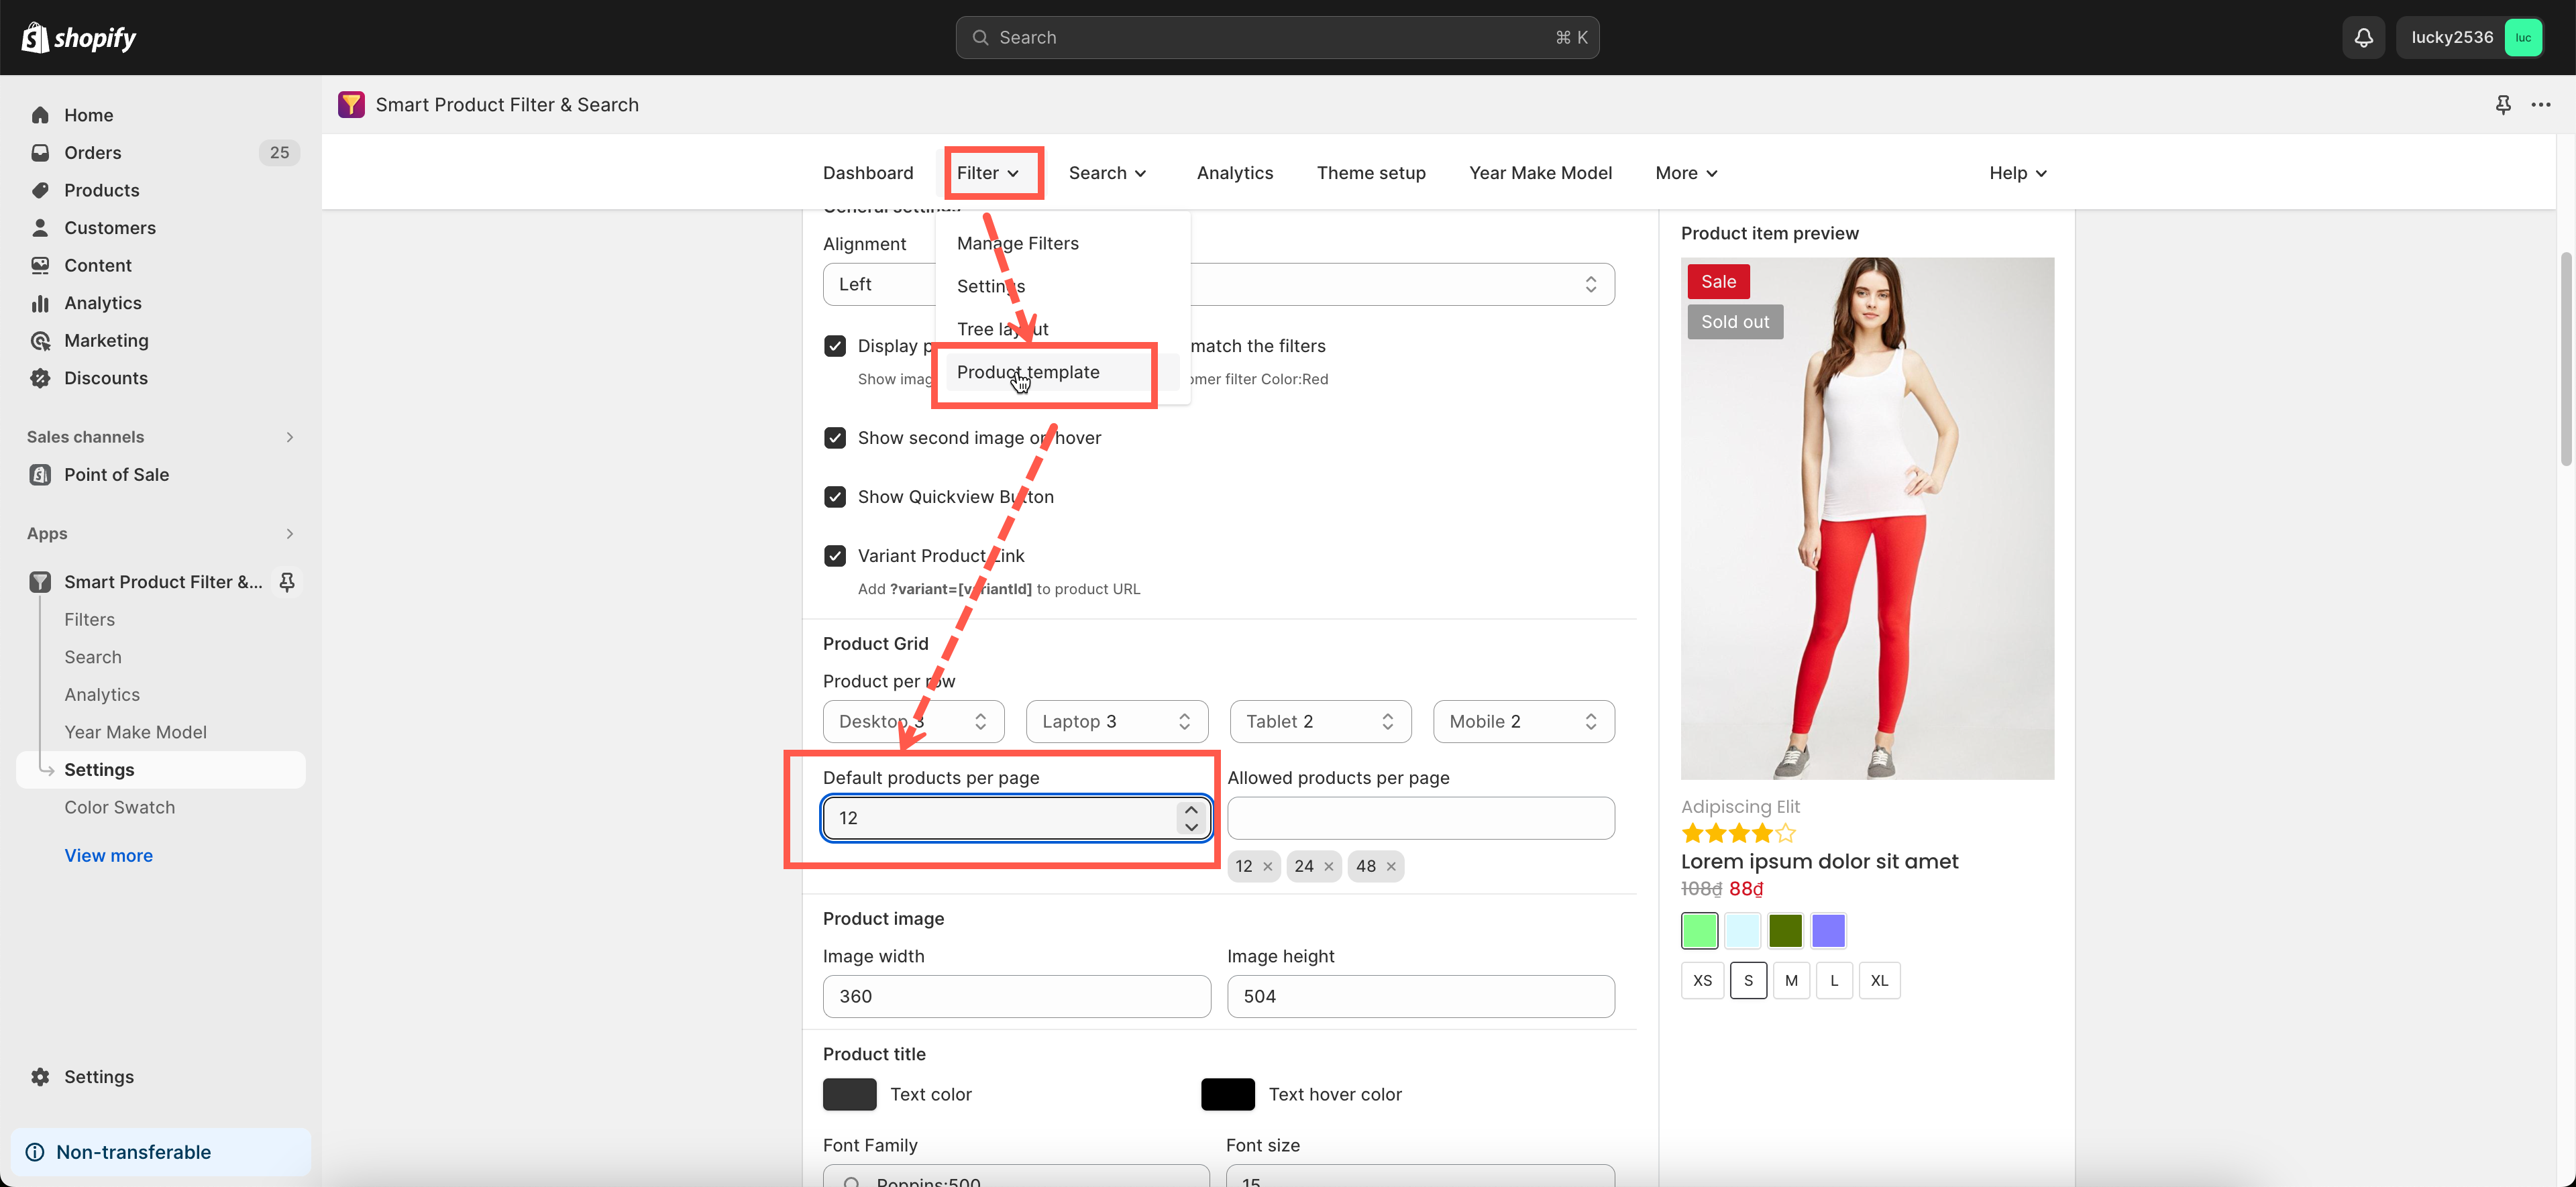
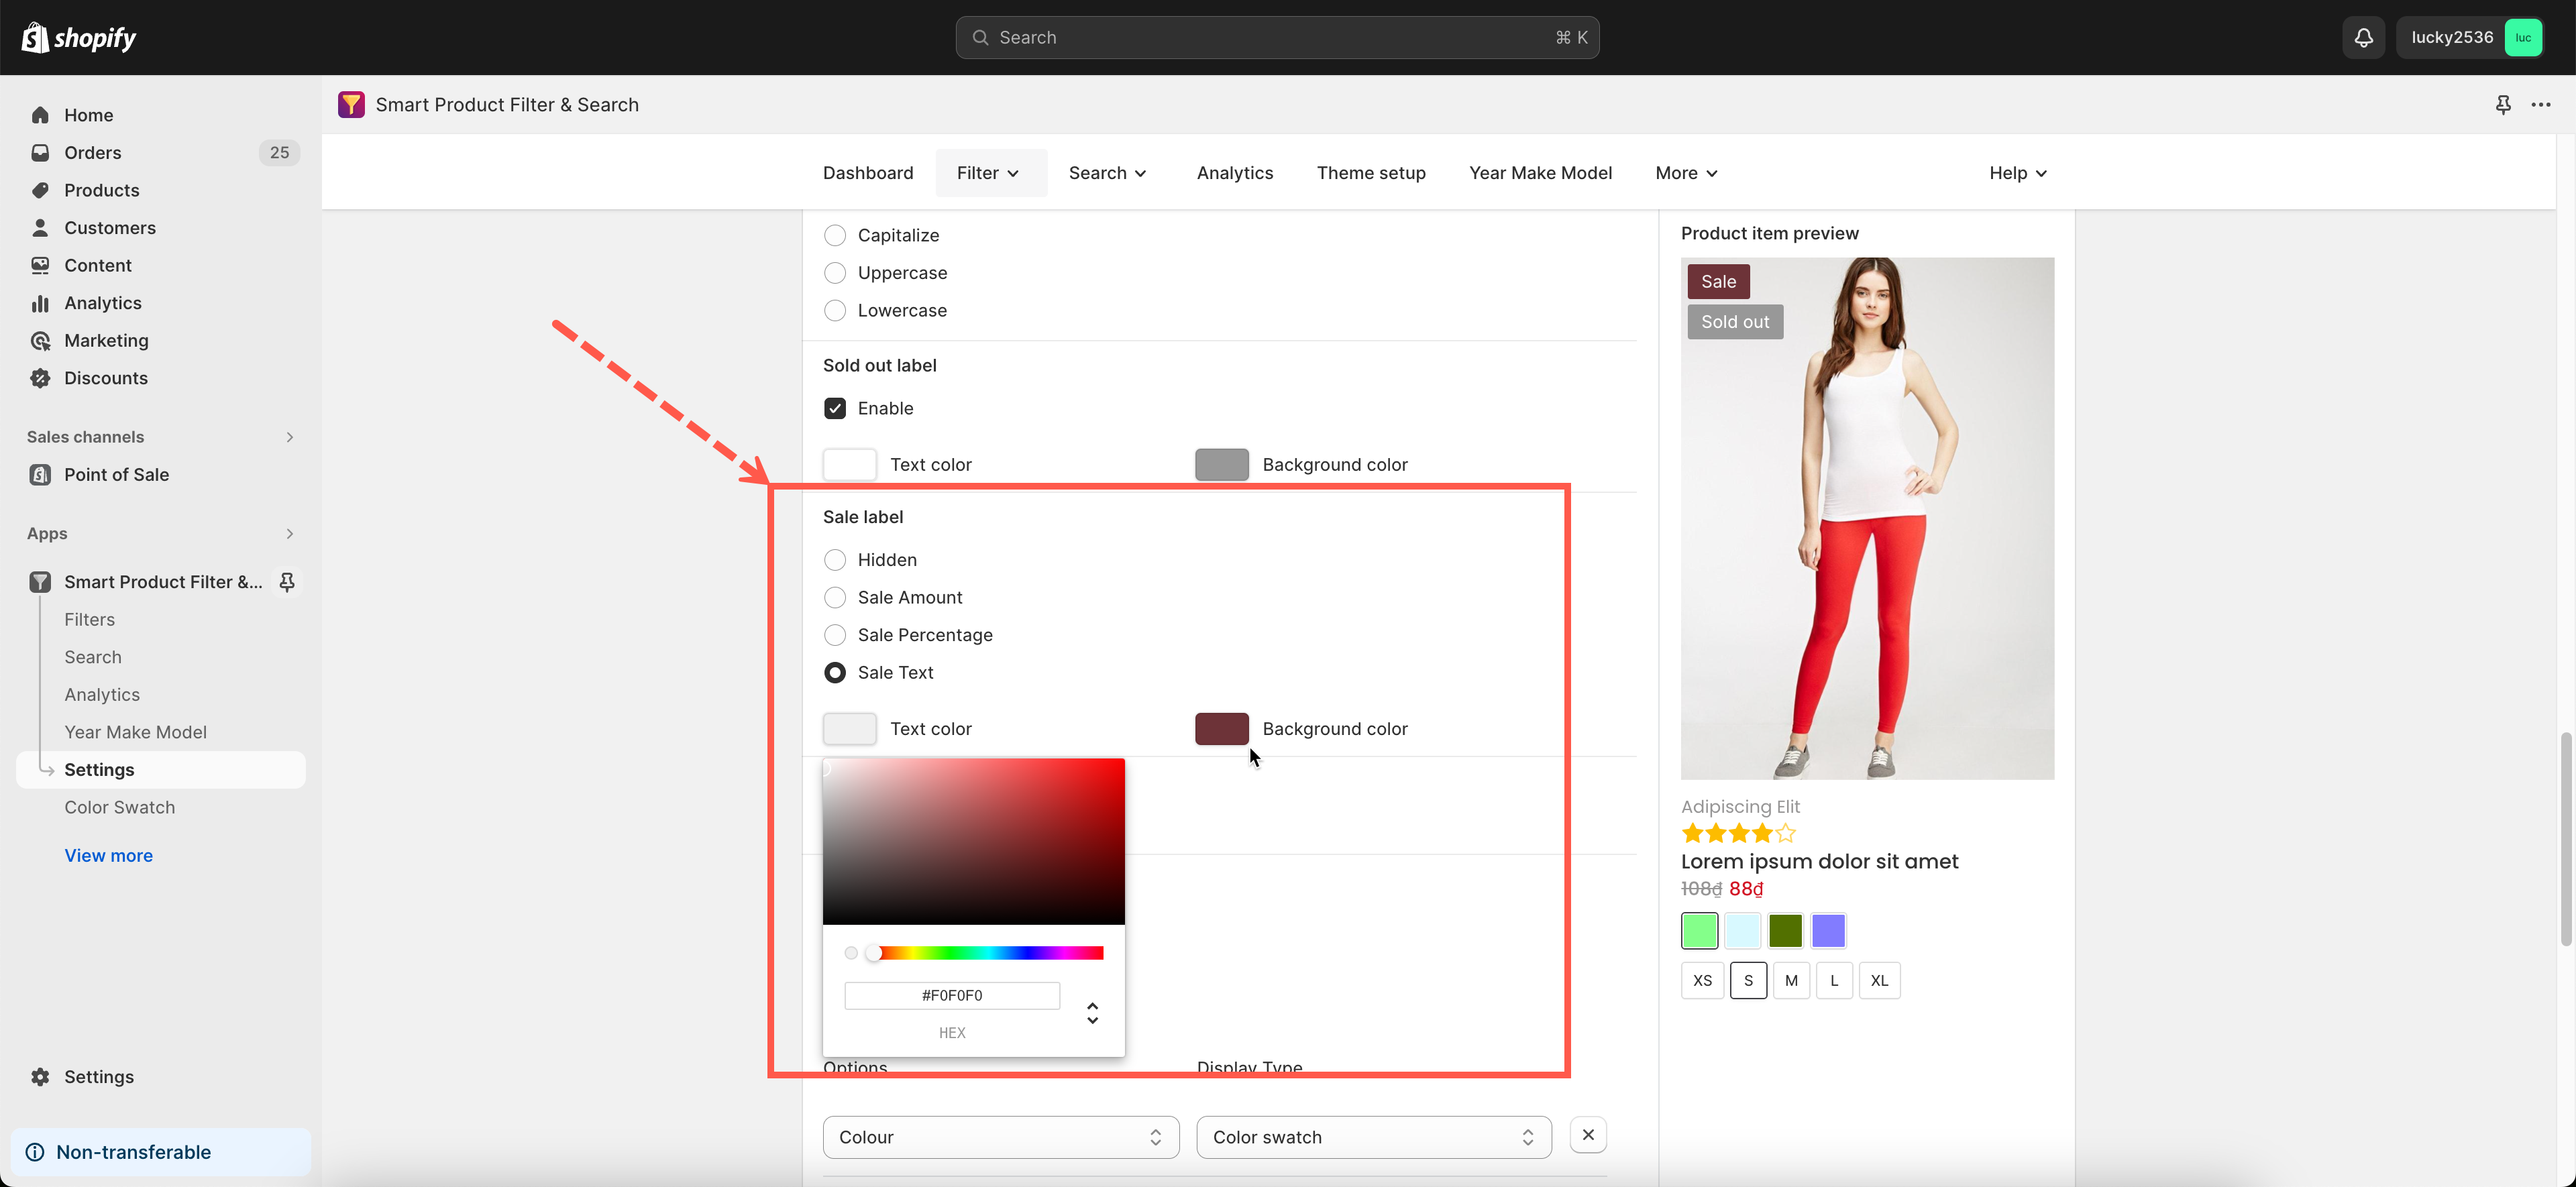
Configuring app product list layout
Manage product template
Our app provides four stunning product templates. You must choose a suitable template by ticking on a radio button.
Mange products per page
You decide the number of products that can show up on one page.
- The default number of products per page: Define the default number of products showing up on one page. For example: If you enter the ‘9’ value, the collection page will showcase nine products on each page by default.
- Allowed number of products per page: Define the number of products per page options that customers can switch.
Manage products per row
You set up the number of products per row for unique screen resolutions in this configuration. This filter app supports four different screen sizes.
- Desktop and Large laptop (> 1200px)
- Small laptop (992px – 1199px)
- Tablet (576px – 991px)
- Mobile (< 576px)
Configure product image
This setting allows specifying the product image’s width and height. You must enter the width and height in the corresponding fields (px unit).
Configure product background color
In the Background color field, enter the color code for the background of the product information area.
Configure product title
Steps
- In the Title color field, enter the color code for the title.
- In the Hover title color field, enter the color code for the hover action.
- In the Title font size field, enter the font size for the title (px unit).
- In the Title font family dropdown, select the font family for the title.
- Show the second image on hover: Tick on this checkbox if you want to show the second product image when the client hovers over the product.
- Show Quickview Button: Tick on this checkbox if you want to show the quick view button (eye icon) when the client hovers over the product.
Manage add to cart button
Steps
- On the Enable checkbox, tick on this option to enable the Add to cart button on the collection page, and vice versa.
- Set up color for the elements of add to cart button. They include: Text Color / Background color / Border color / Hover text color / Hover background color / Hover border color.
Manage sold out label
Steps
- On the Enable checkbox, tick on this option to enable the Sold out label on the collection page, and vice versa.
- Set up color for the elements of the sold-out label. They include Text Color and Background color.
Manage sale label
Steps
- On the list of radio checkbox, select one option for displaying the sale label on the collection page. The app provides four options that include the Hidden / Sale amount /Sale percent /Sale Text.
- Set up color for the elements of the sale label. They include Text Color and Background color.
Manage review badge
Steps
- On the Enable checkbox, tick on this option to show up the product reviews on the collection page, and vice versa.
- Select the review app you are using for your store. Check the list of compatible apps here.
Manage color swatch
Check this article to learn more.
Manage product vendor
Steps
- On the Show Vendor checkbox, tick on this option to display the vendor information on the collection page, and vice versa.
- In the Vendor font size field, enter the font size for the Vendor name (px unit).
- In the Vendor font family dropdown, select the font family for the Vendor name.
- In the Vendor color field, enter the color code for the Vendor name.
- In the Hover vendor color field, enter the color code for the hover action.
Manage product price
Steps
- On the Show Price checkbox, tick on this option to display the product price on the collection page, and vice versa.
- In the Price font size field, enter the font size for the product price (px unit).
- In the Price font family dropdown, select the font family for the product price.
- In the Price color field, enter the color code for the product price.
- In the Old Price color field, enter the color code for the old product price.
- In the Sale Price color field, enter the color code for the sale product price.